
OverviewClone from a public repo on GithubClone from a private repo on GithubAuthenticate through VS Code (or supported IDE)Authenticate through Github CLIInstall or Upgrade Github CLIAuthorize access via Github CLI
Overview
In nearly all cases, the repo and code you need to get started sits in the cloud. Github is used most often for this and we’ll show you how to move the entire repo from Github to your Nimbus machine. If you’re not using Github, you can use these general steps as guidance for the steps you’ll need to take with your source code and version control management tool of choice.
Cloning repos (i.e. moving your code repositories) to Nimbus is done through “git” commands. Specifically, you’ll be using the
git clone command. Git comes pre-installed on all Nimbus machines and does not need to be set up. Clone from a public repo on Github
To clone from a public repo, simply find the URL of the repo and run the
git clone command in the terminal. You can use the IDE terminal or any other terminal that is connected to your Nimbus machine.For example, if you were to clone a repo that was at <https://github.com/example/public-demo-repo>, you’d run:
bashgit clone https://github.com/example/public-demo-repo
When this command is run, you will see an output similar to the following:
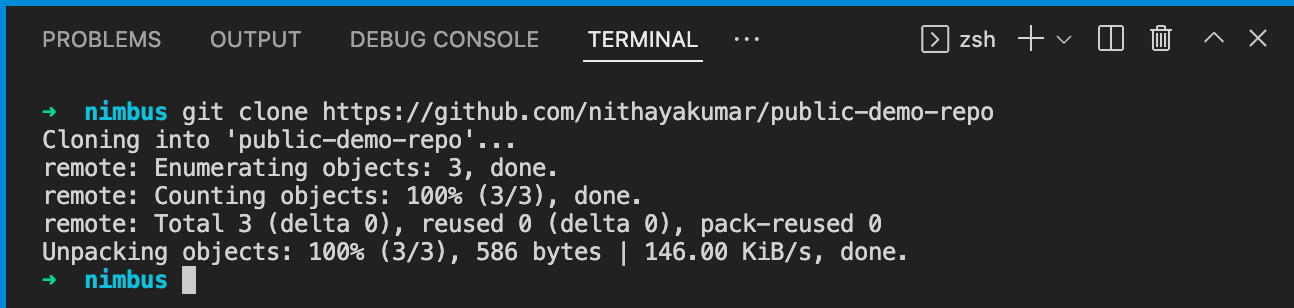
Following this, you will see the repo added to the Nimbus machine. You can navigate this via terminal commands or through the directory explorer built into your IDE.
Clone from a private repo on Github
Private repos, on the other hand, cannot be copied to your Nimbus machine without the appropriate credentials. If you attempt to clone a private repo without the appropriate authorization, you will receive a “repository not found” error.

You will have to authenticate yourself before cloning a private repo. There are two primary ways to authenticate yourself - through an IDE integration or through the Github CLI (Command-line Interface).
Authenticate through VS Code (or supported IDE)
In VS Code, if you attempt to clone a private repo at <https://github.com/example/private-demo-repo> with
git clone https://github.com/example/public-demo-repo, you will see a pop up asking you to sign-in with Github.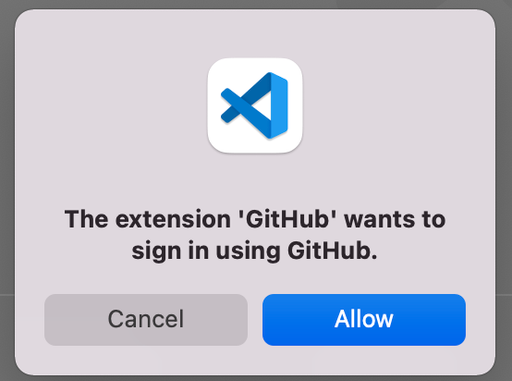
Select “Allow” to continue to the browser-based authentication built into VS Code and complete the cloning process. You’ll receive results similar to cloning a public repo.
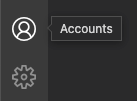
You may not receive this pop-up if you are already logged in to another GitHub account. Sign out of GitHub in VS Code in the bottom left using the Accounts button above Settings. See image for the icon you are looking for:
If this does not resolve the issue, use the alternative methods described below.
Authenticate through Github CLI
Install or Upgrade Github CLI
If you do not already have the Github CLI installed, install it easily using the following commands:
bashcurl -fsSL https://cli.github.com/packages/githubcli-archive-keyring.gpg | sudo dd of=/usr/share/keyrings/githubcli-archive-keyring.gpg

echo "deb [arch=$(dpkg --print-architecture) signed-by=/usr/share/keyrings/githubcli-archive-keyring.gpg] https://cli.github.com/packages stable main" | sudo tee /etc/apt/sources.list.d/github-cli.list > /dev/null

sudo apt update

sudo apt install gh
If you already have the Github CLI installed and want to upgrade the version, run the following command:
bashsudo apt update

sudo apt install gh
Both commands come from the official Github CLI documentation on installation for Linux OS: https://github.com/cli/cli/blob/trunk/docs/install_linux.md. See https://cli.github.com/ for more general Github CLI information.
Authorize access via Github CLI
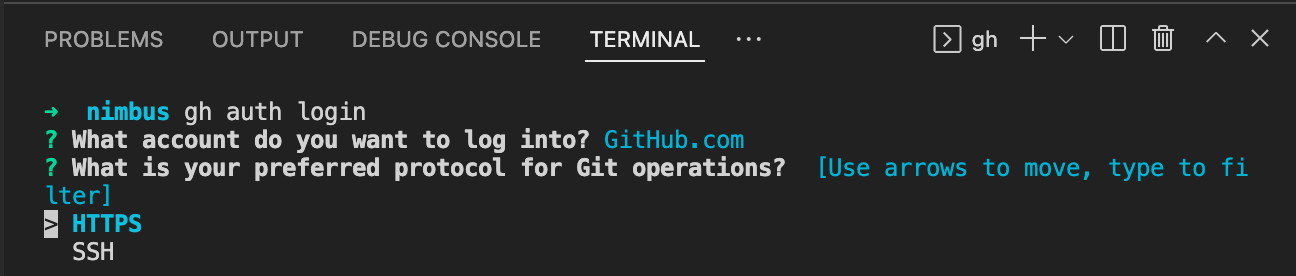
Once the Github CLI has been installed, you’re able to sign in to Github to authorize access to clone a private repo. To begin the process, run the following Github sign in command:
bashgh auth login
Running this command will prompt you to select the type of Github.com account that you would like to sign into (Github.com or Github Enterprise Server). Note: The instructions in this document are for Github.com but similar prompts can be followed for Github Enterprise Server.
Select Github.com to continue and receive an option for your preferred protocol for Git operations (SSH or HTTPS). Select the method you’d like to use (here is a simple explanation on the differences for those looking to learn more: link)
Once a protocol for Git operations is selected, you will have an option to connect using a web browser or authentication token. Note: If you selected SSH as your preferred protocol, you will have a few more simple steps to complete that are not shown here.

If you select “login with a web browser”, you’ll be redirected to Github on your default browser to login and provide access to Nimbus.
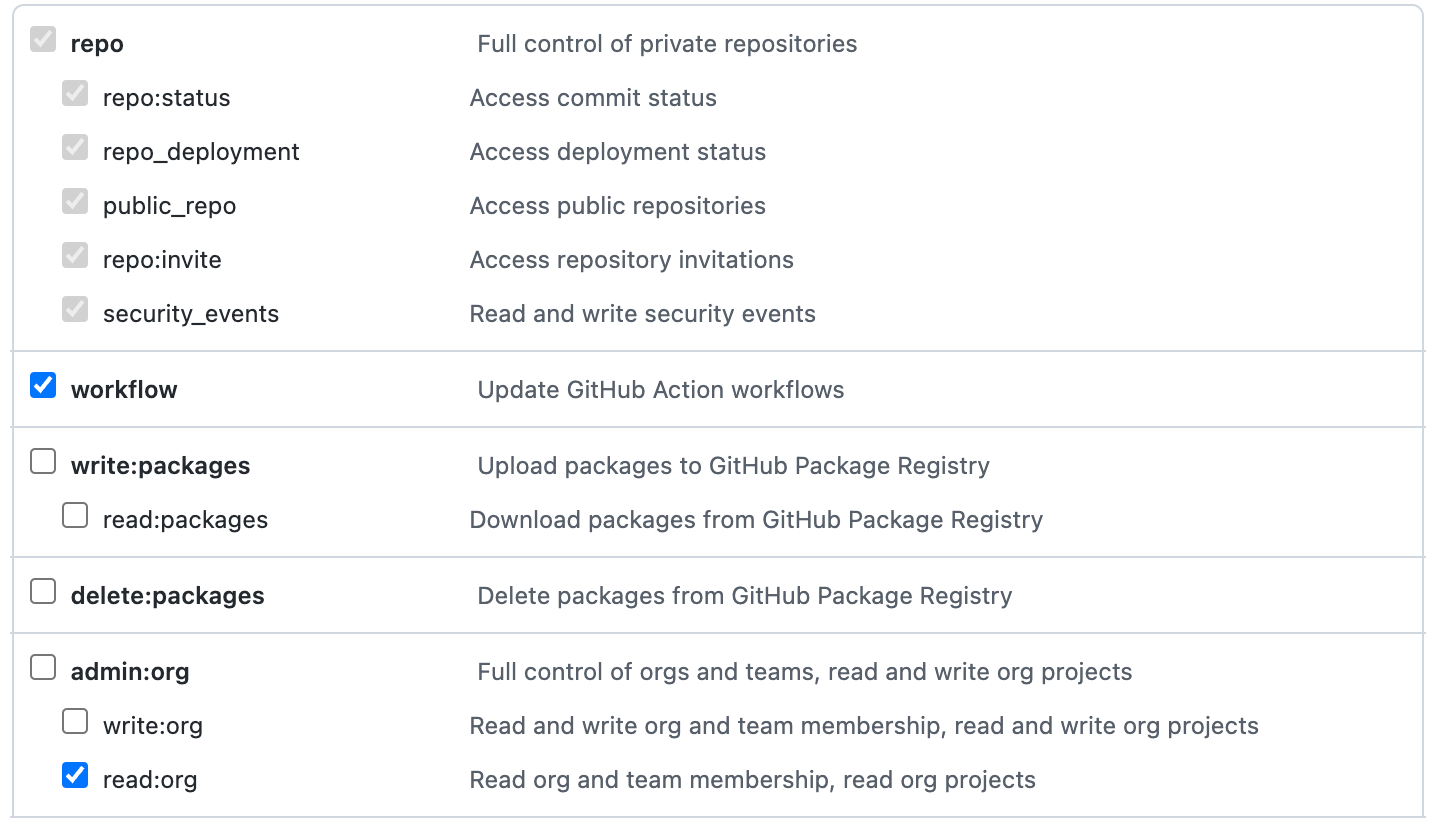
If you select “paste an authentication token”, you’ll receive a link to the token creation page and guidance on the fewest rights required to be able to clone the repo into your Nimbus machine (see below). You can use the token generated to provide access to Nimbus from the terminal window.
Once you’ve granted authorization through the token or web browser login, you will be able to run the
git clone with a link to the private repo successfully!