This document shows you how to deploy a self-hosted Nimbus solution on AWS EC2 (Linux)
Requirements
The instructions under this documentation assume you already have all the required access/policy on AWS. AWS does not recommend using AdministratorAccess in general for this type of use case. However, using AdministratorAccess guarantees everything will work for the first-time deployment.
You need a license key in order to deploy Nimbus. Please reach out to support@usenimbus.com to request a license key.
Create Instance Profile Role for EC2
This instance profile role authorises Nimbus to provision AWS resources for workspaces, templates, and so on.
First of all, navigate to AWS IAM, and click Create Role and follow the instructions for each step.
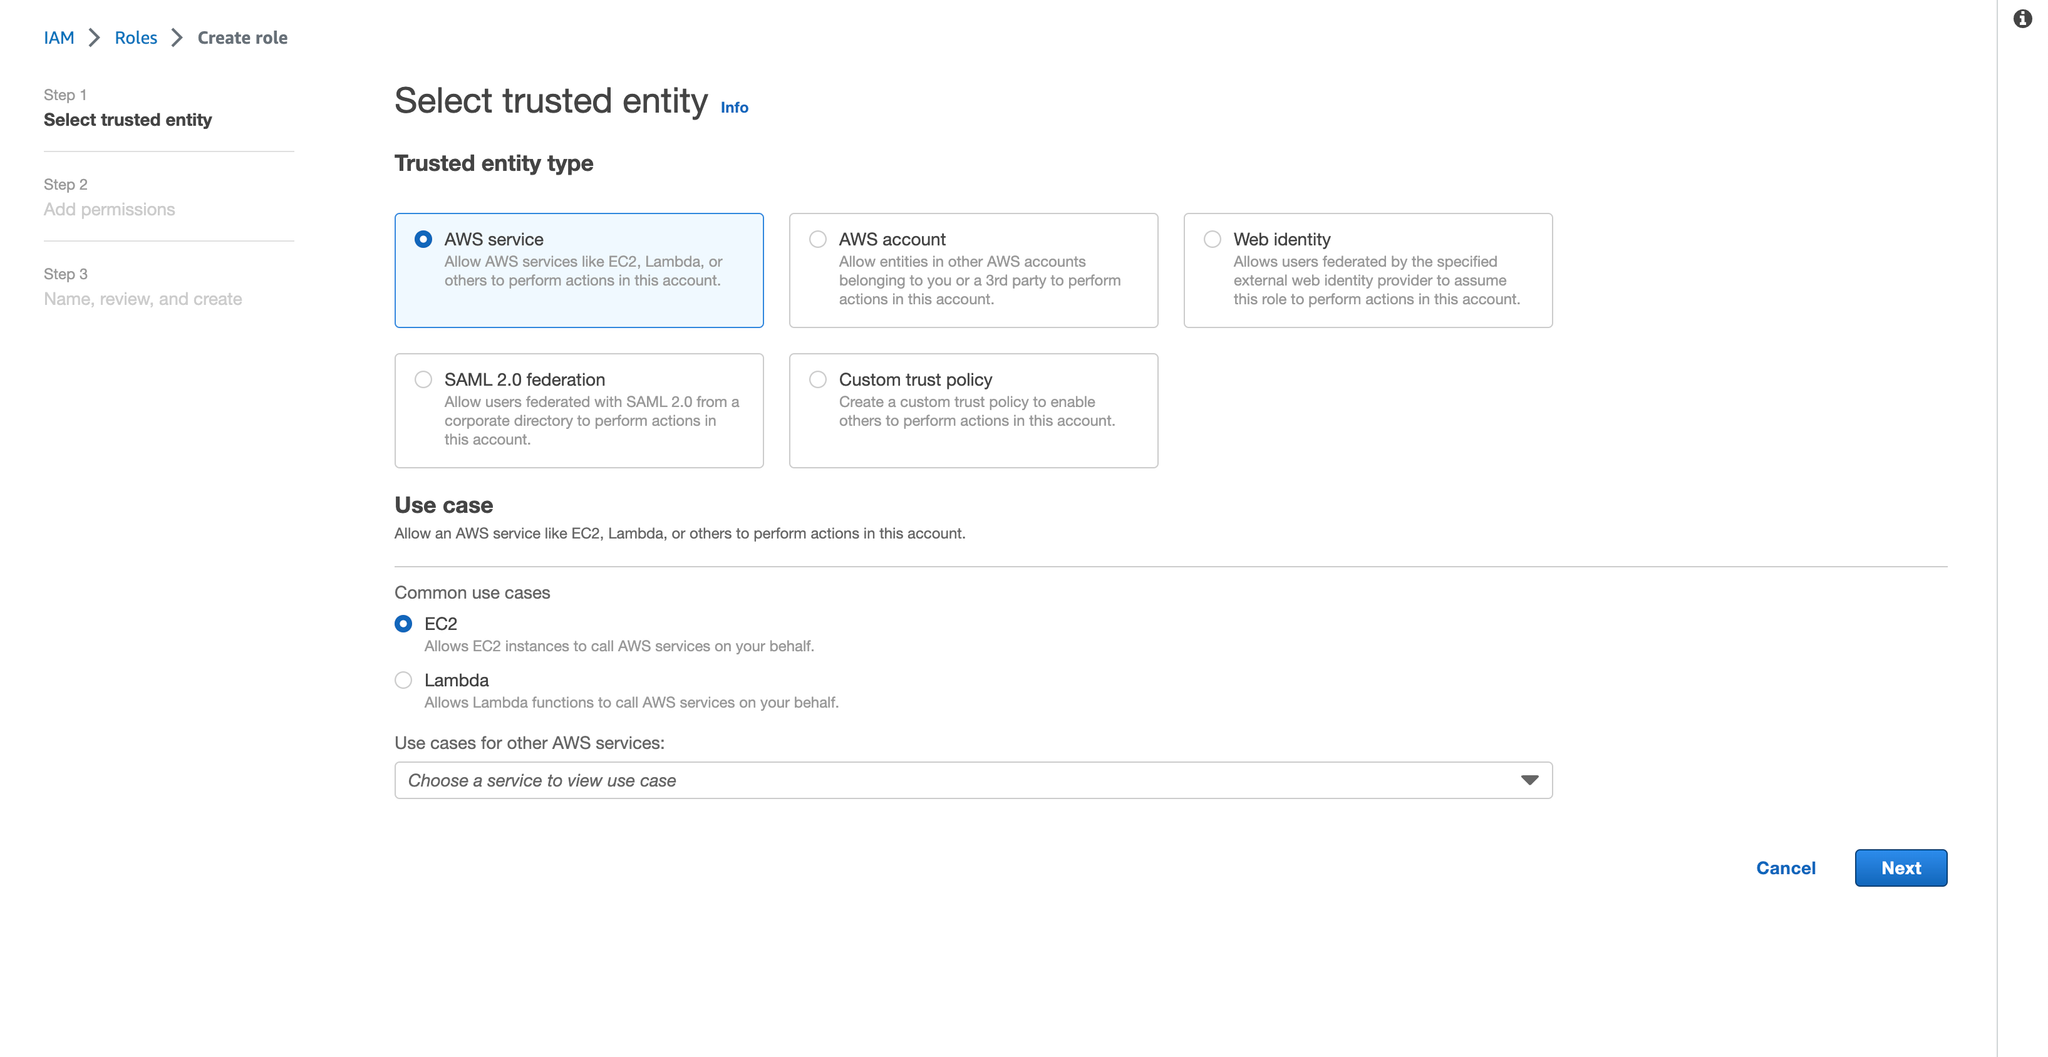
Step 1: Select trusted entity
Select AWS service and in Use case, select EC2
Step 2: Add permissions
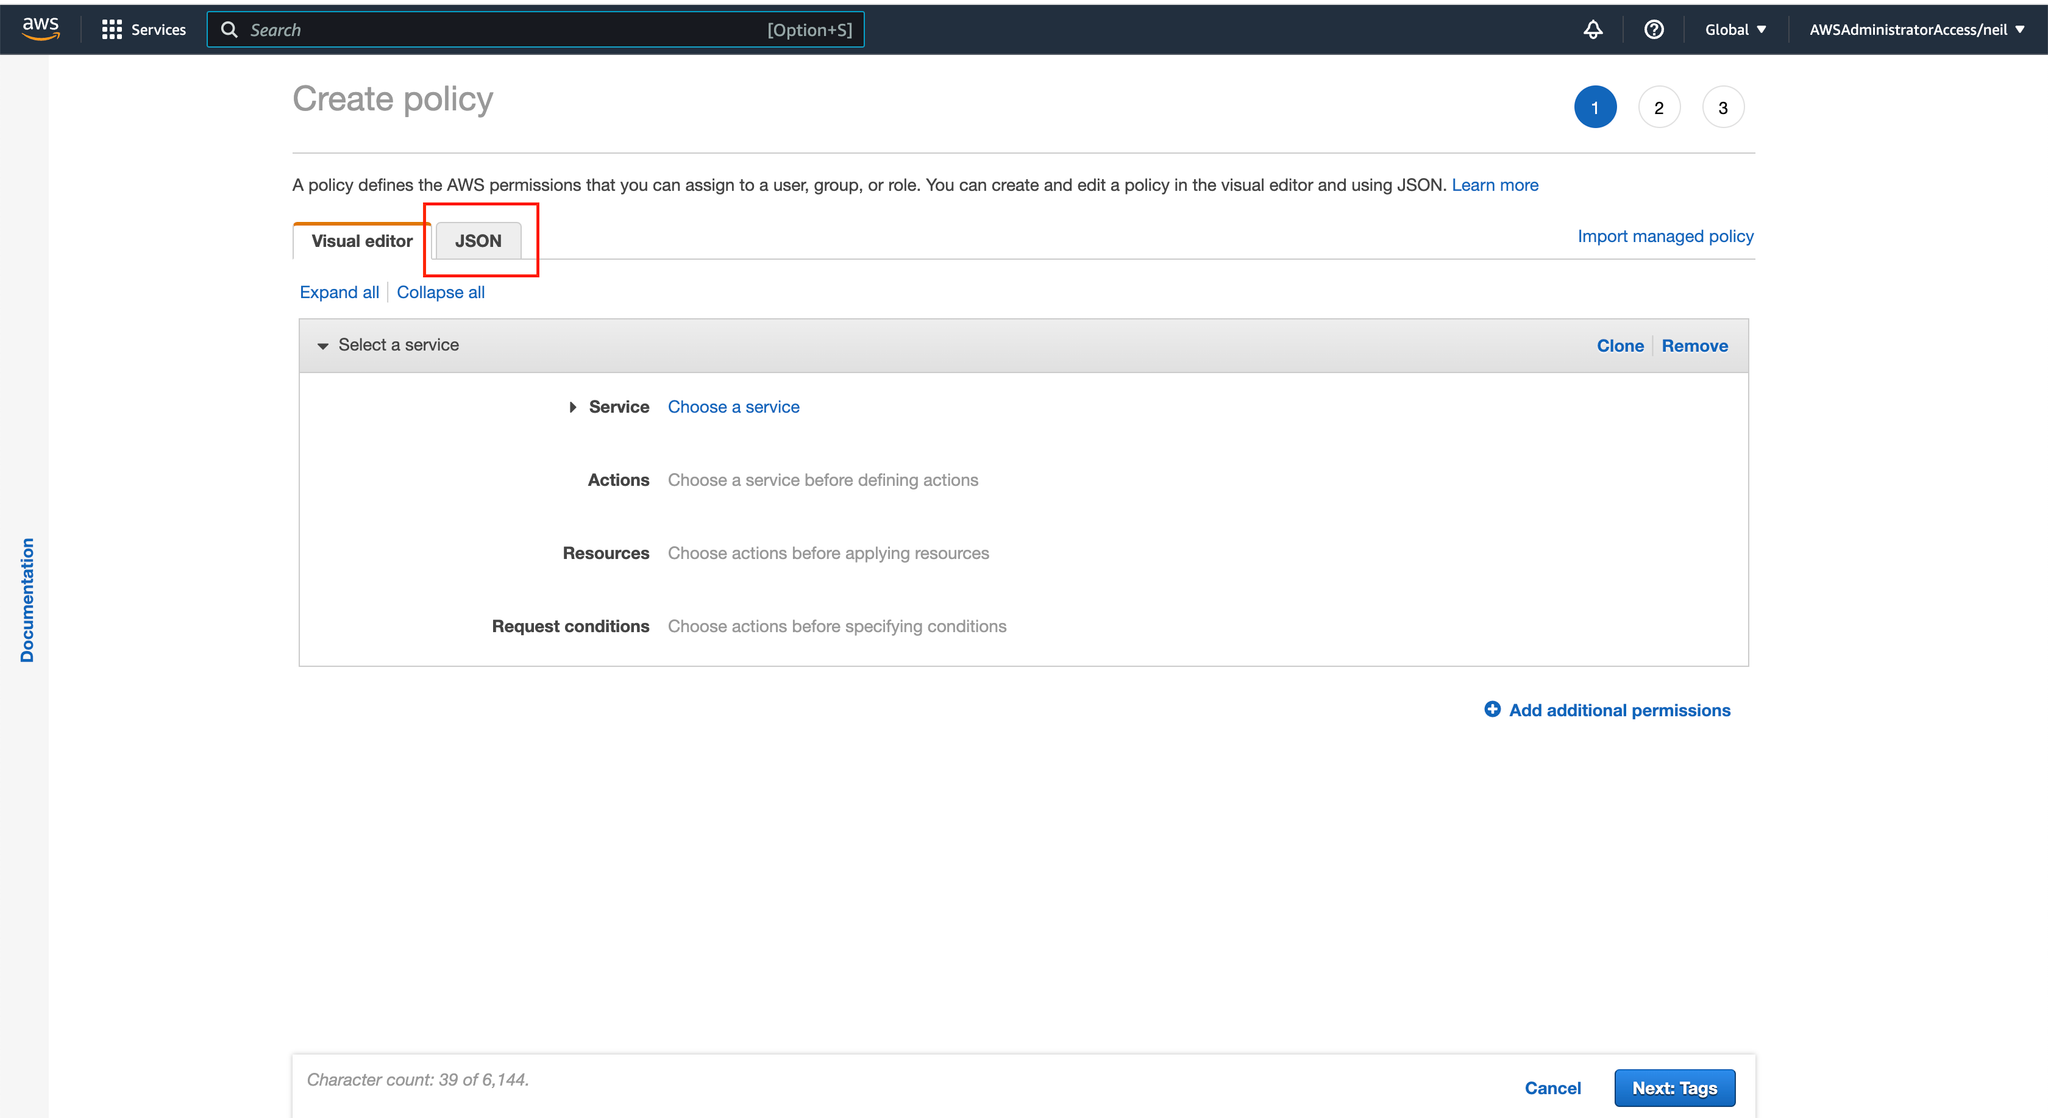
Click on Create Policy in the top right corner to open a new page that allows you to define the AWS permissions that you can assign to a user, group or role.
In the creation page that opens, click on JSON, and copy/paste the JSON that follows:
Once JSON has been pasted, click next. You can optionally add tags in the next page as you wish. After that, click next again.
Review Policy
Give a name for this policy, for example, NimbusControlPlanePolicy. Then click the Create Policy button.
Return to Role Creation
Once the policy has been created, you will return to the previous window (on Step 2 of Role creation). Refresh the page to see the policy that you just created. Check the box for to enable that policy and continue forward by selecting Next.
Step 3: Name, Review, and create:
Give this role a name, for example, NimbusControlPlaneRole. Then click the Create role button.
In the future, you can come back to add more permissions if needed (for example, if you use Terraform templates to provision custom resources for your workspace)
Setting Up Security Groups for EC2
To set up a security group for an EC2 instance, navigate to the AWS EC2 Dashboard. On the side panel, clicks Security Groups.
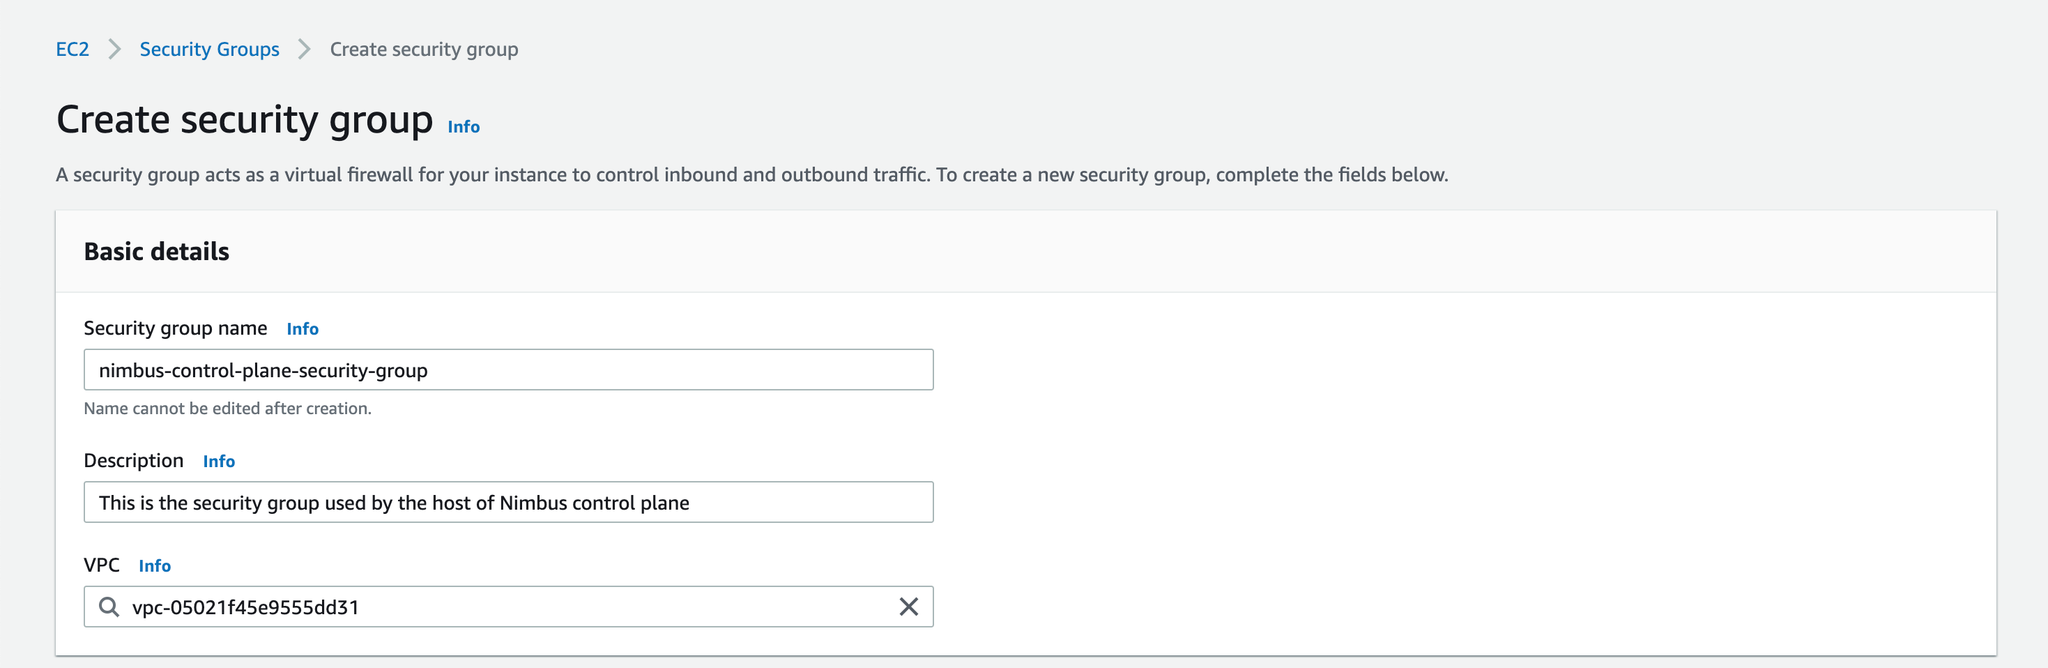
In the upper right-hand corner, click Create Security Group. In the creator screen, name the security group something relevant to the EC2 instance you will create.
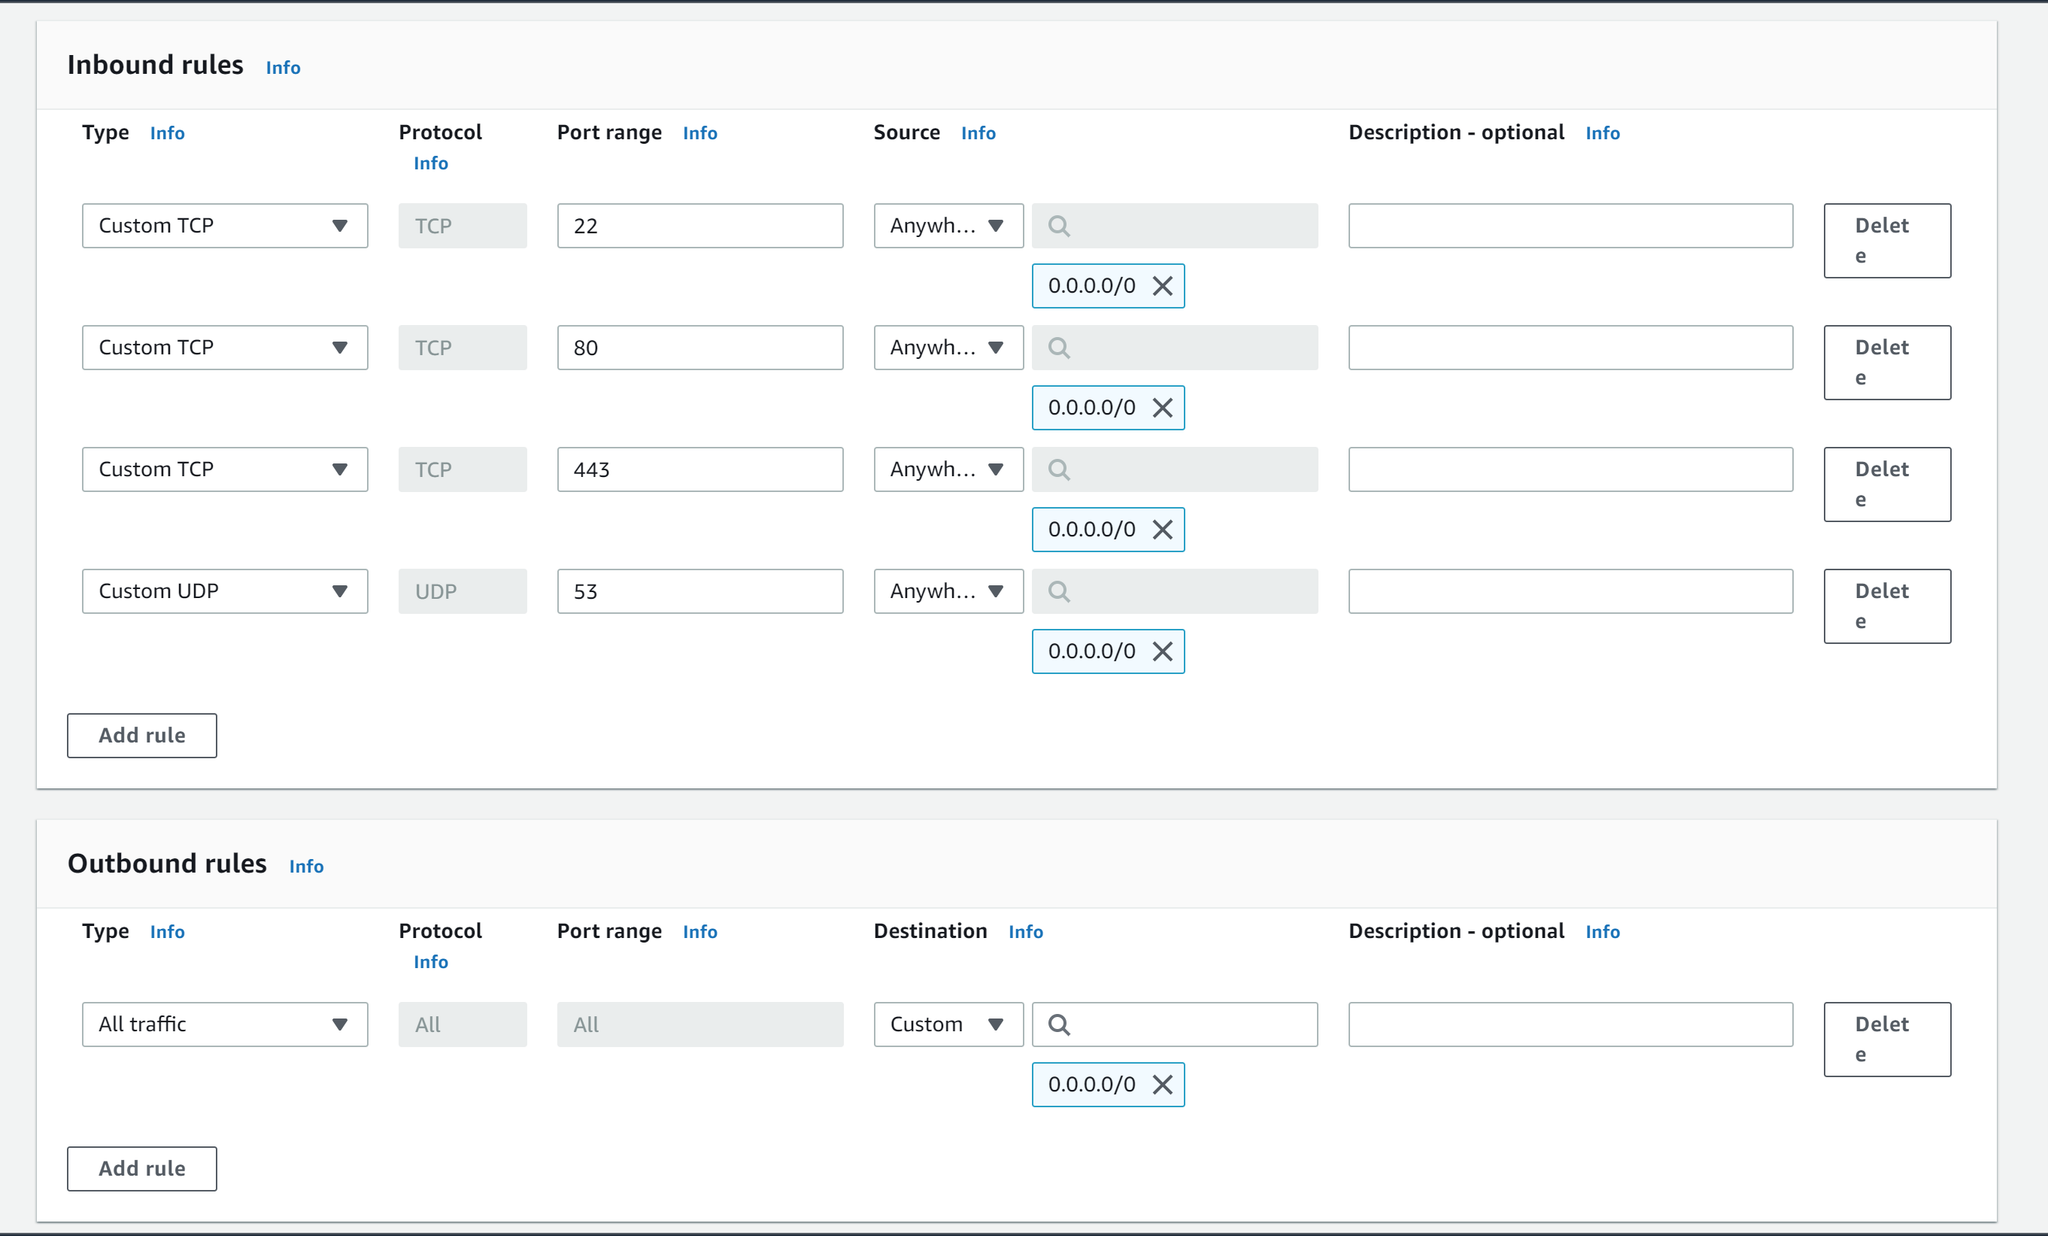
Create a new Inbound Rule allowing SSH from your computer’s IP address.
Here are the ports required by Nimbus:
80 (TCP): HTTP requests (will redirect to HTTPS)
443 (TCP): HTTPS requests
53 (UDP): Handling DNS resolve for workspaces URLs
22 (TCP): SSH, just so you can log in to the instance’s terminal
The example below shows Source as “anywhere”. Please modify per your company’s requirement. As far as this instance is accessible in your network, you are good to go.
Click the Create security group button to create the security group.
You’ve now created a security group to be used by the EC2 instances.
Setting Up Your EC2 instance
On the EC2 dashboard, click Instances. This will take you to all the EC2 instances you have created. Click Launch New Instance.
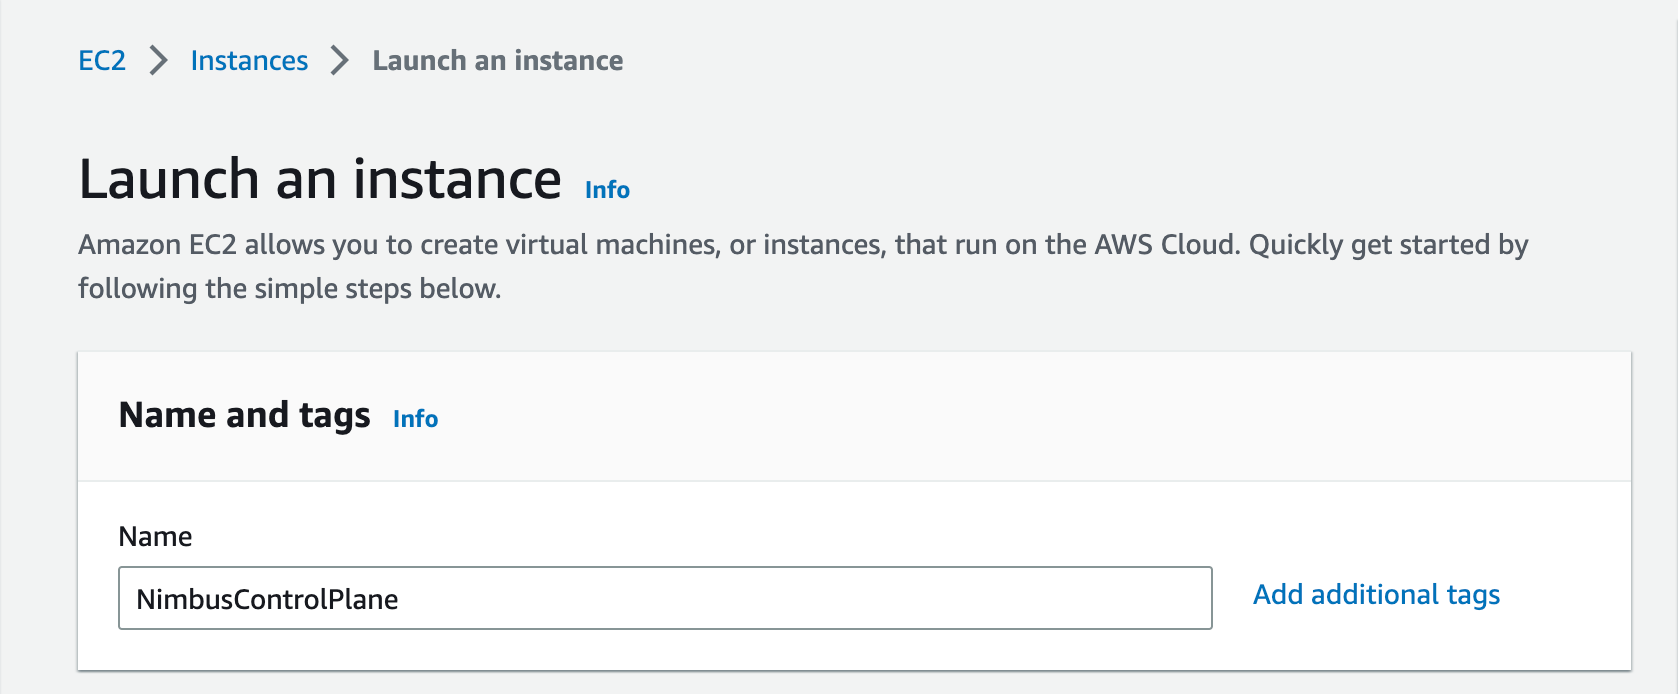
Name
Name the EC2 instance following the naming convention of your choice.
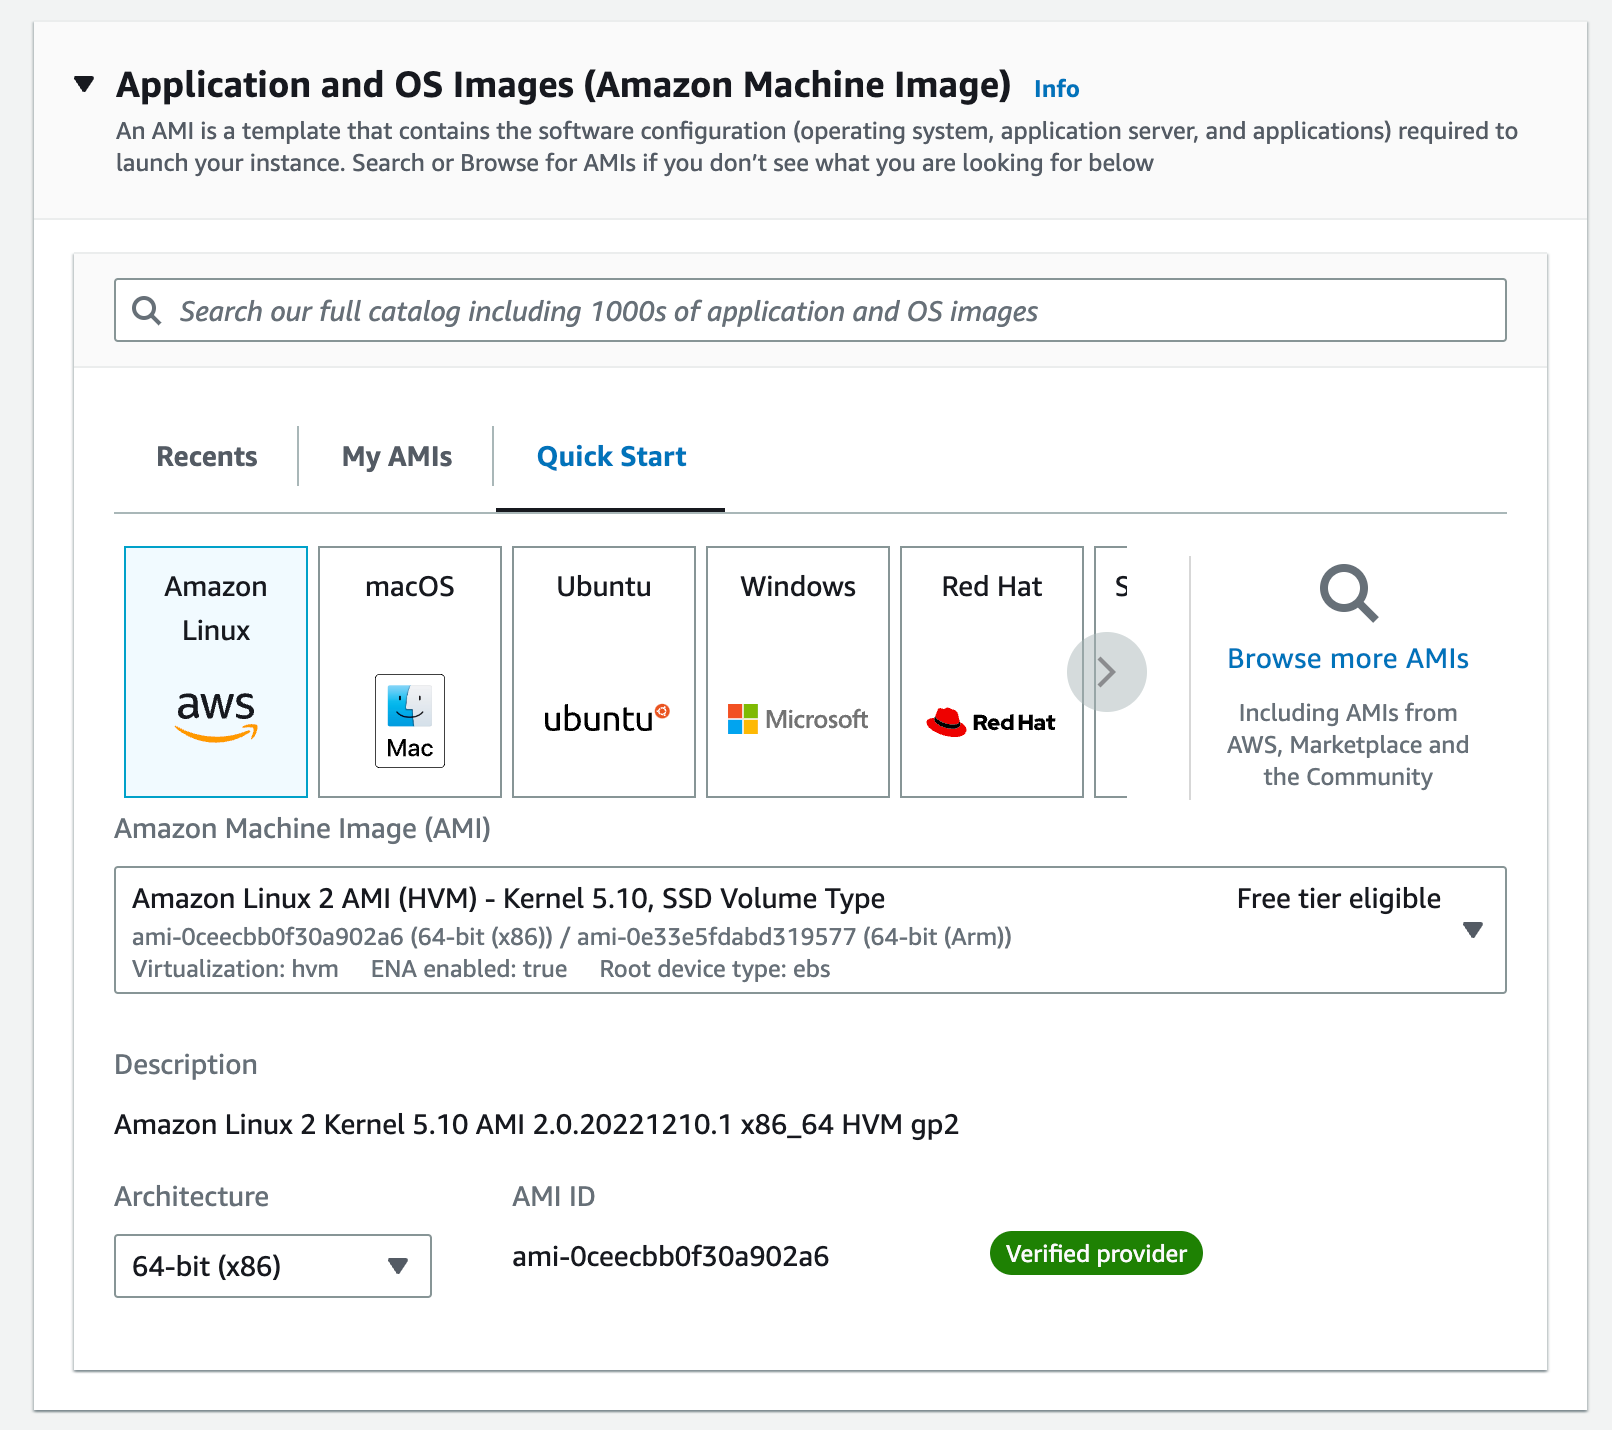
Image:
Select Amazon Linux 2, 64-bit (x86) as the image
Instance Type
We recommend choosing an instance with at least 8GB RAM
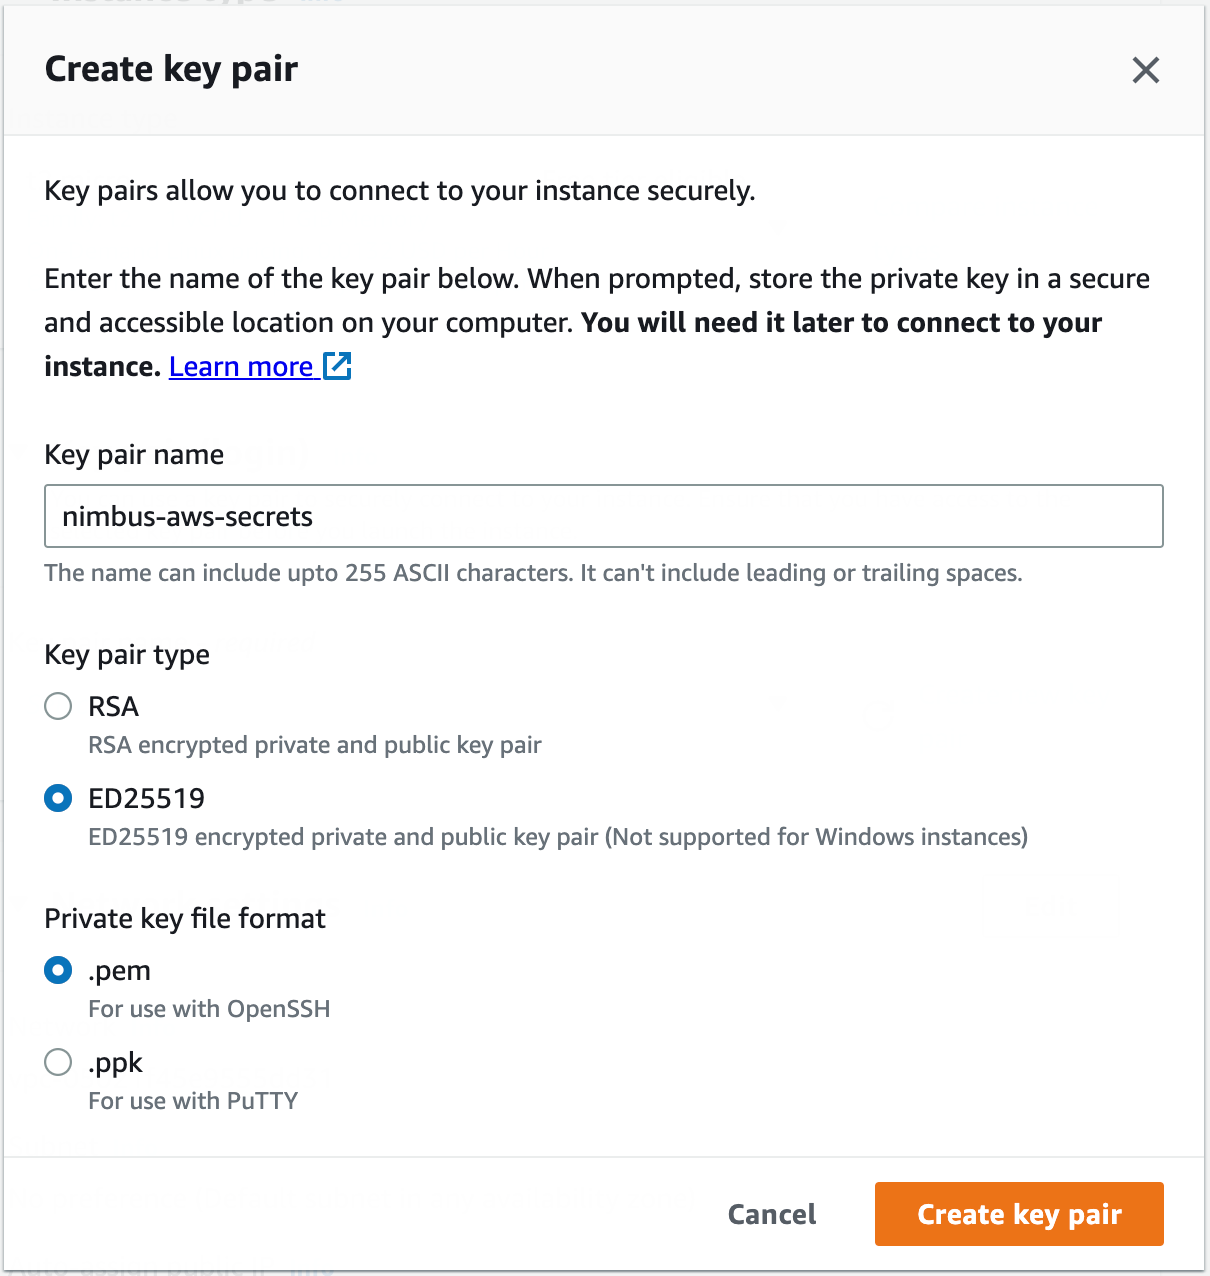
[Optional] Key Pair
If you don’t have any existing keys you will need to create new key pair by following the popped up instruction. For the Create key pair, select ED25519 and .pem and click Create key pair
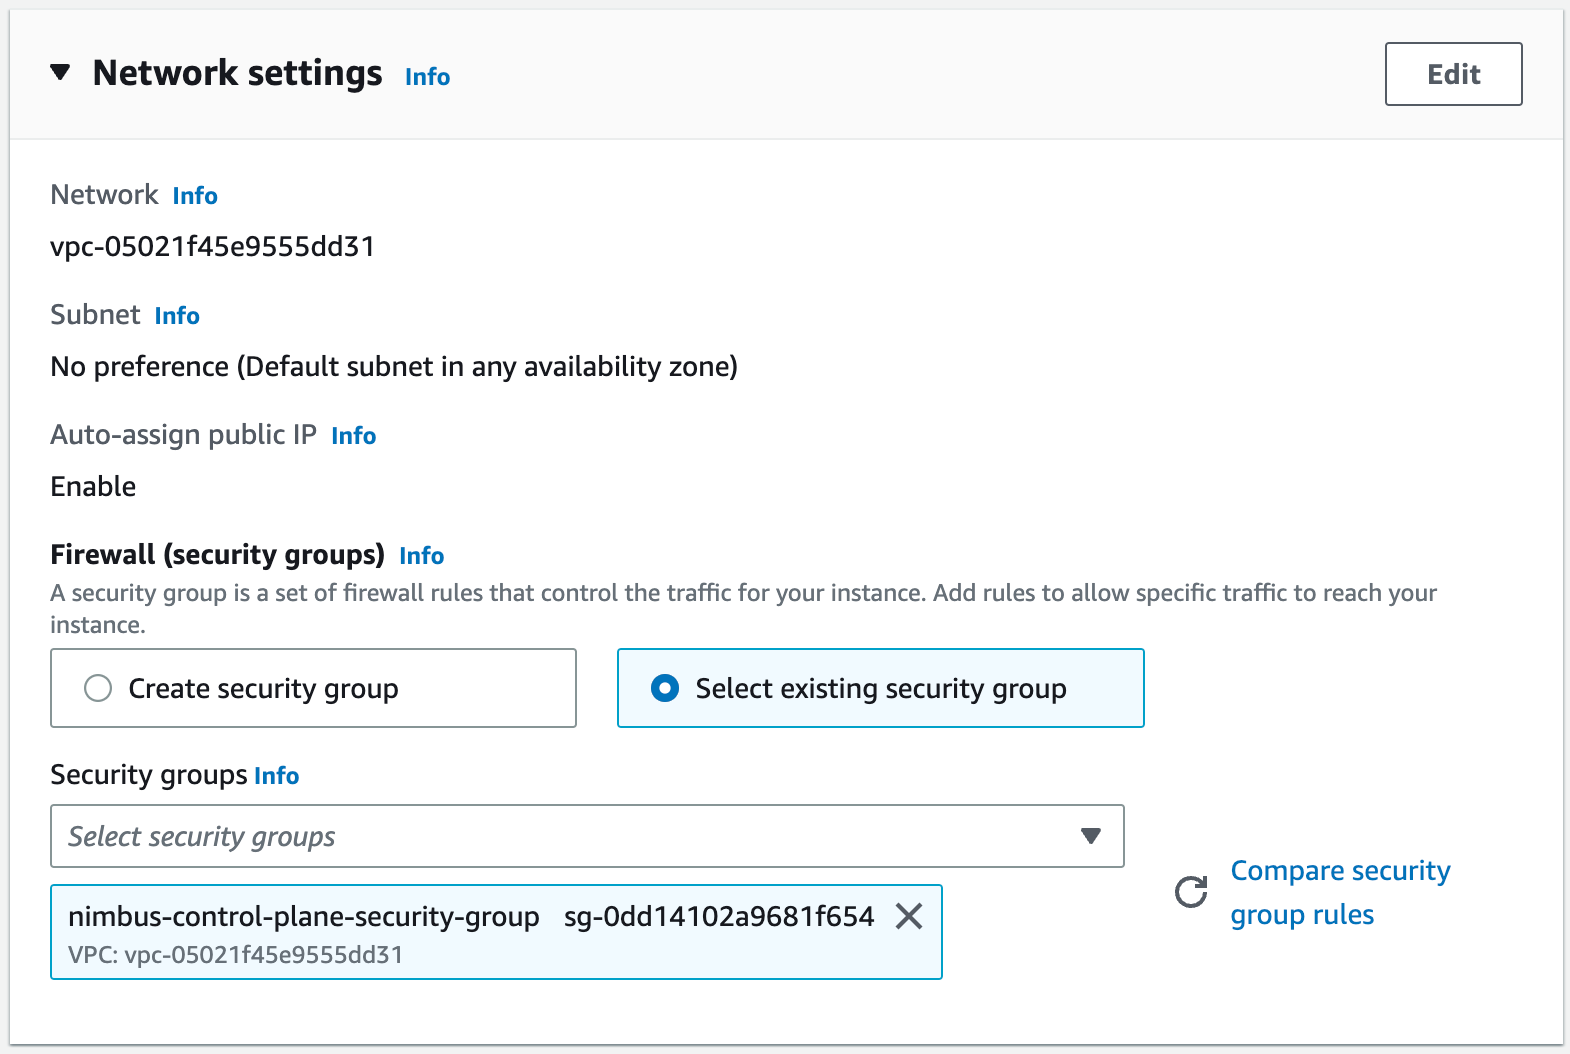
Network Settings:
Next, under Network Settings, change your Firewall security group to Select existing security group, and from the resulting dropdown, select the security group you created in the previous section.
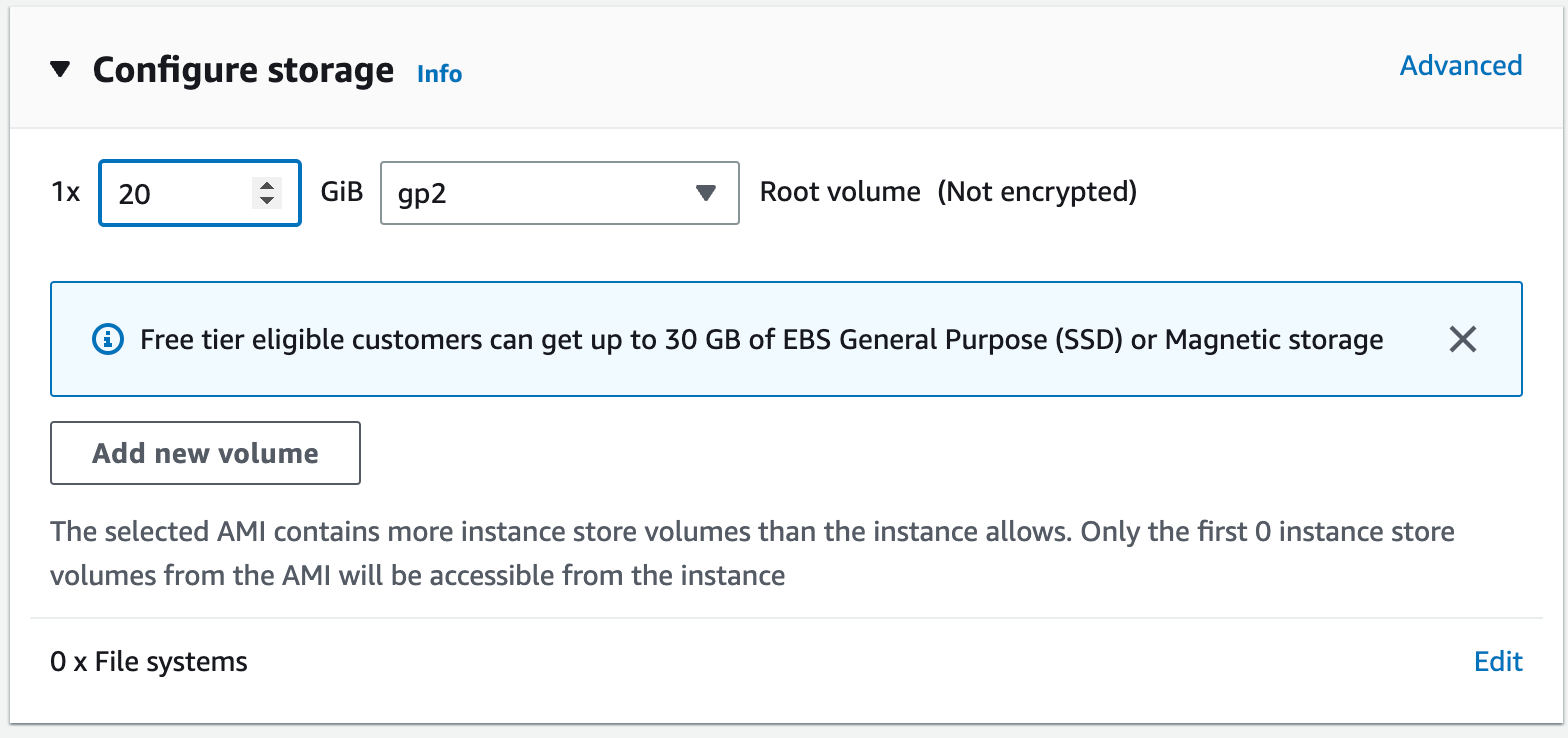
Configure Storage
We recommend having at least 20 GB storage on your control plane
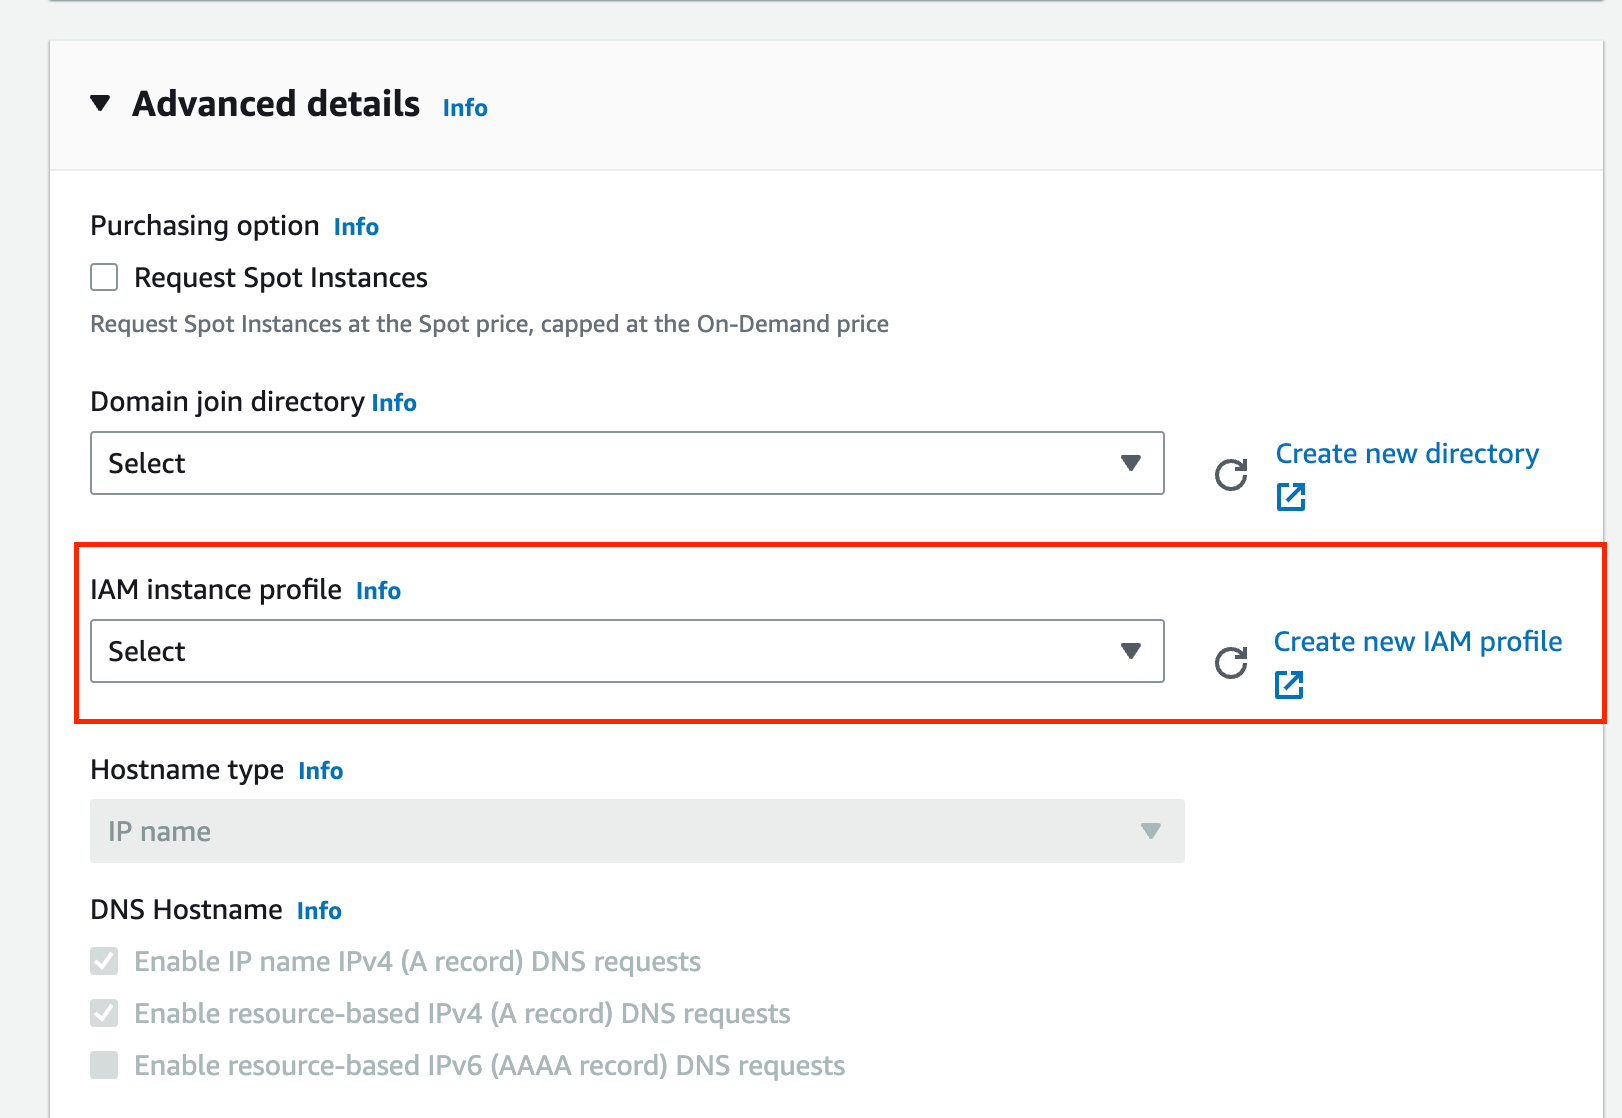
Advanced Settings
In IAM instance profile, click the dropdown, and select the role that you just created at the beginning of this guidance.
Note: It may a few minutes to show up in your existing instances.
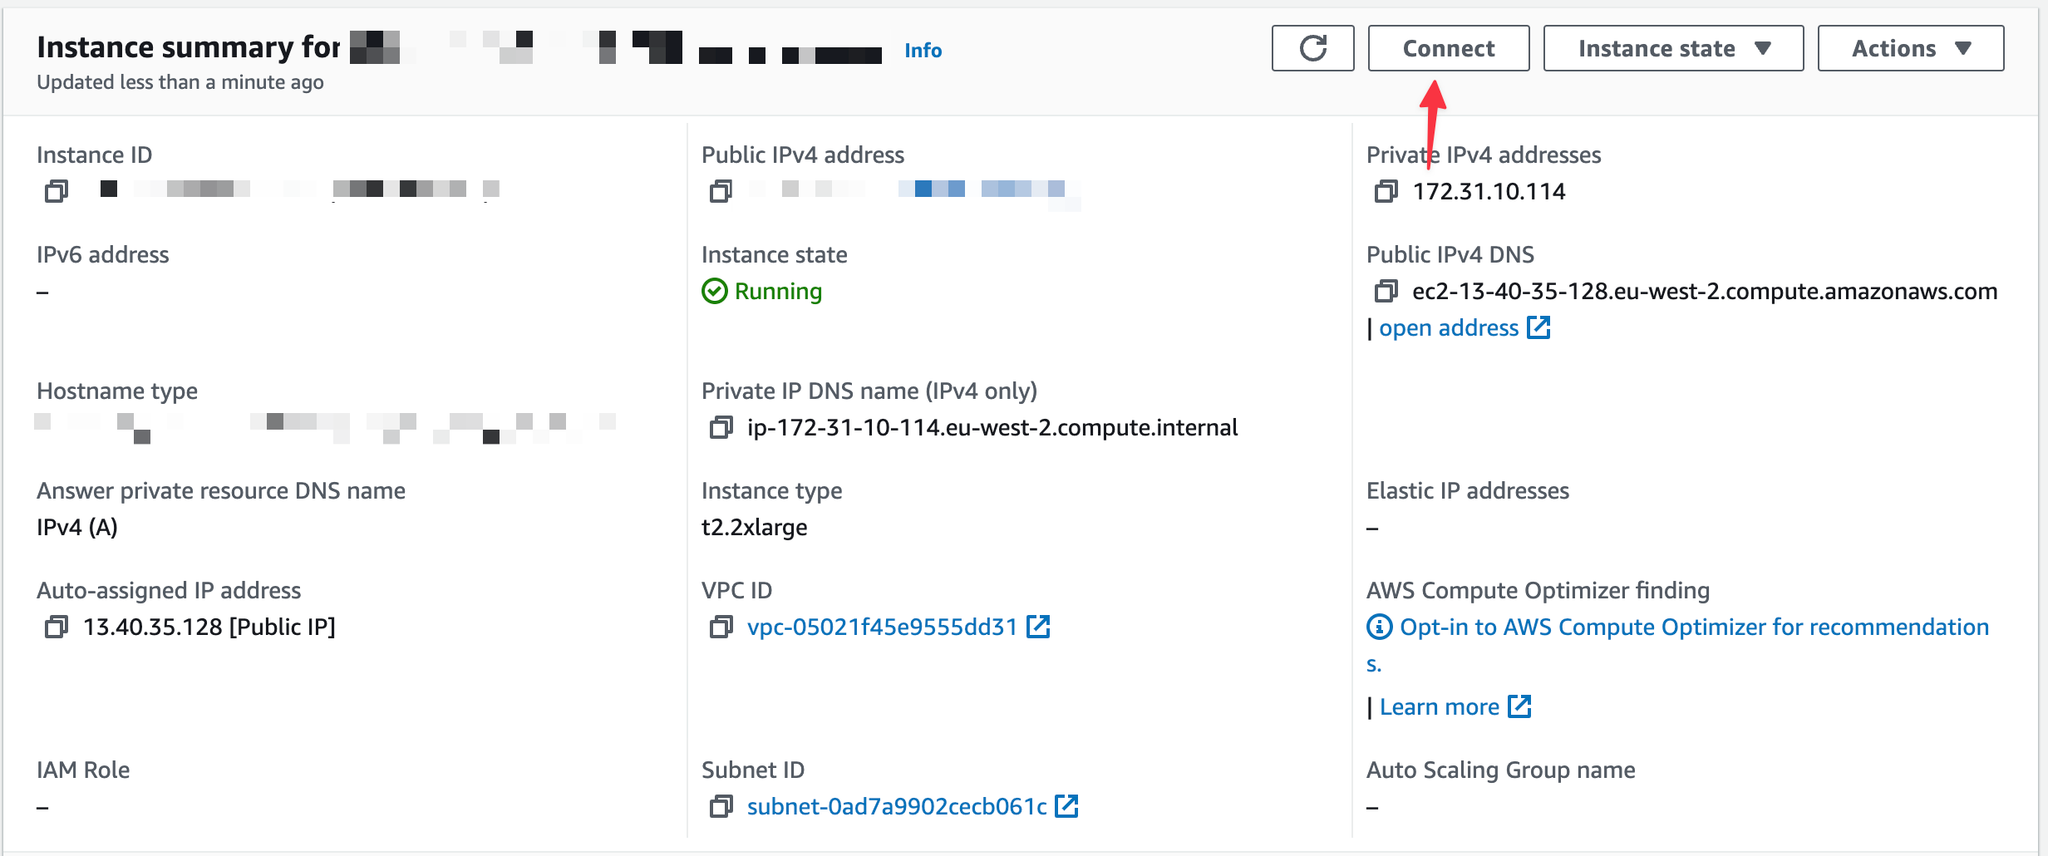
Connect to EC2 Console:
Once the instance is running, go to the instance detail page and click connect on the top right corner
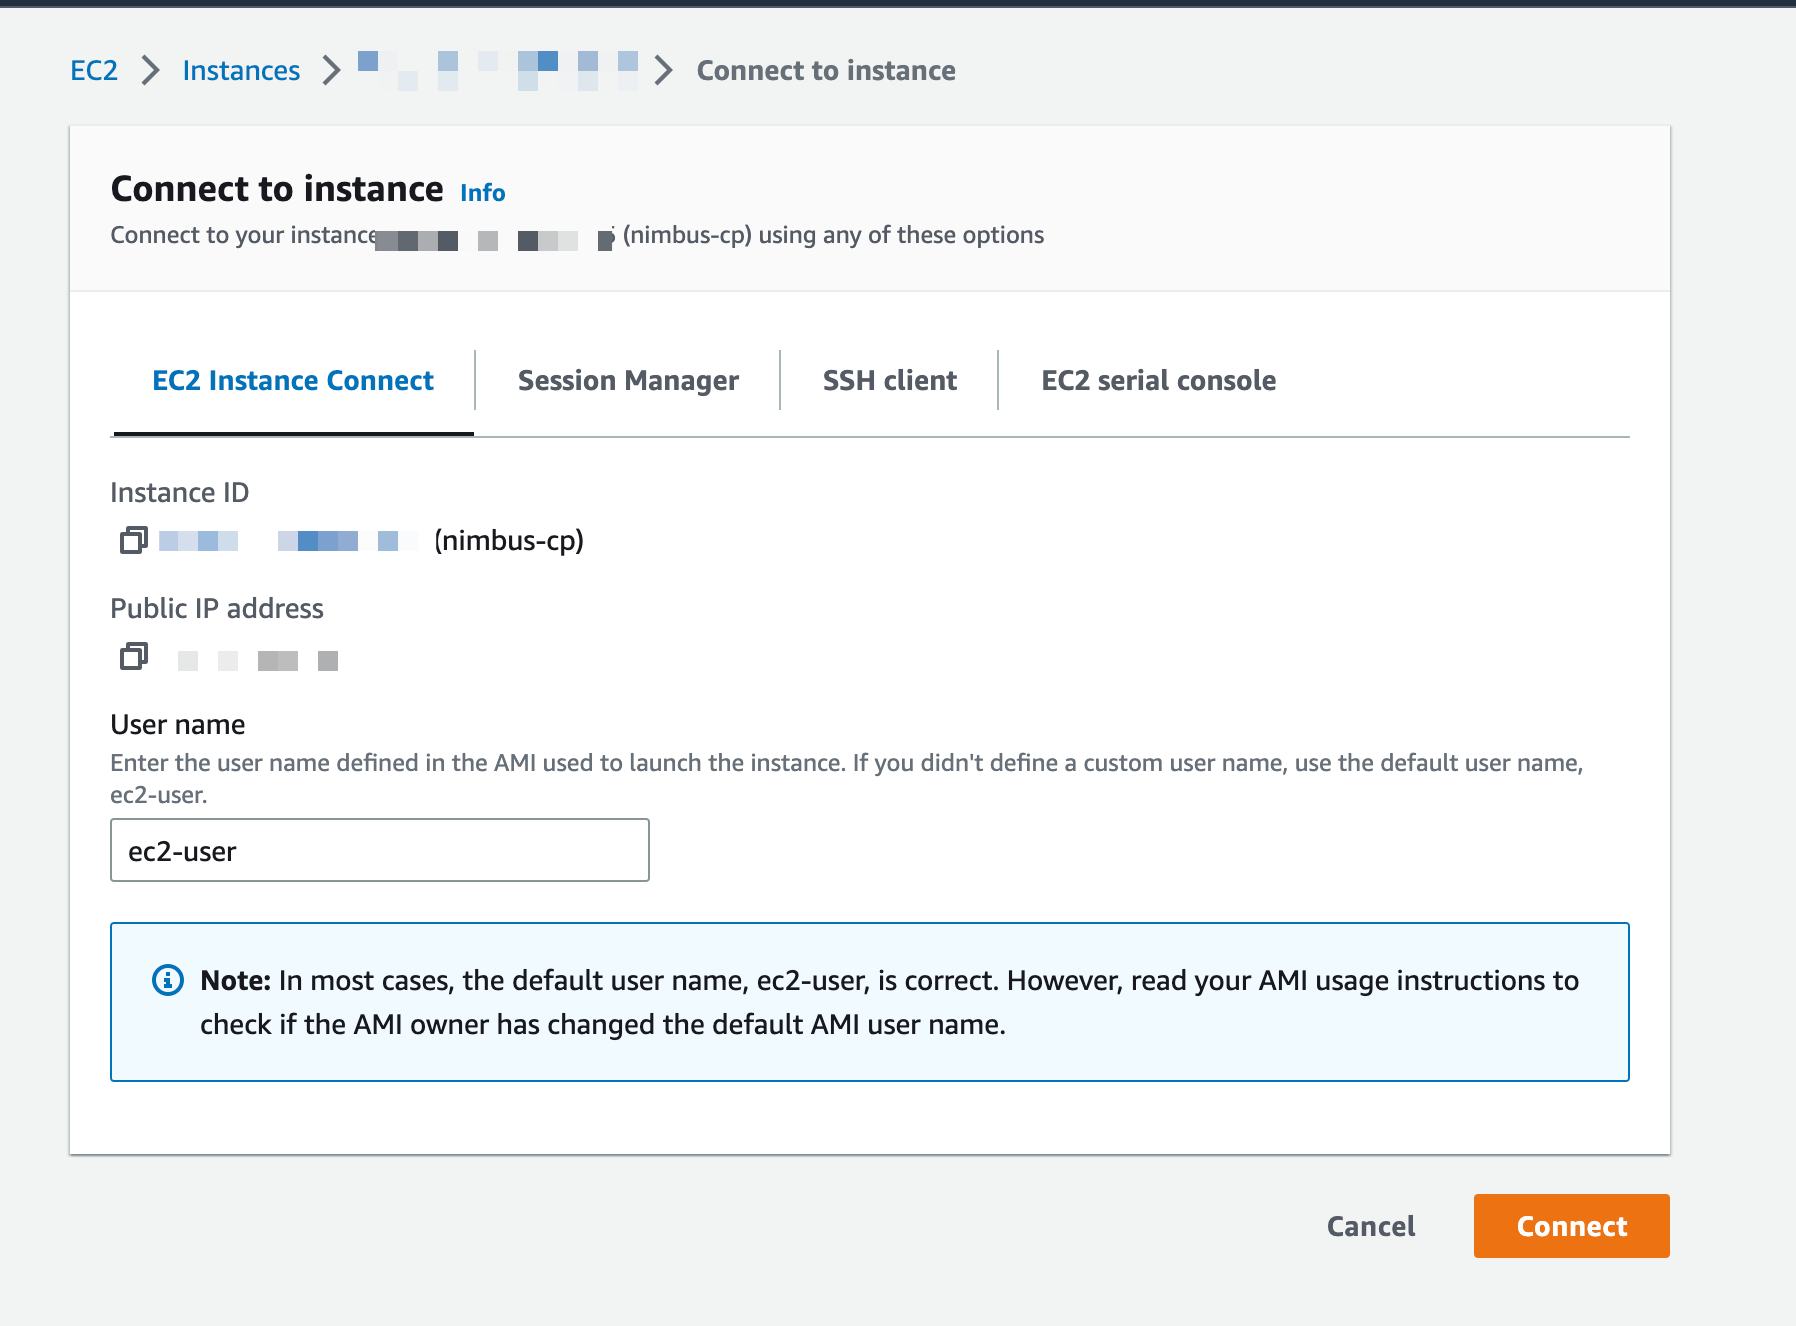
Click connect button to open the terminal console to the EC2
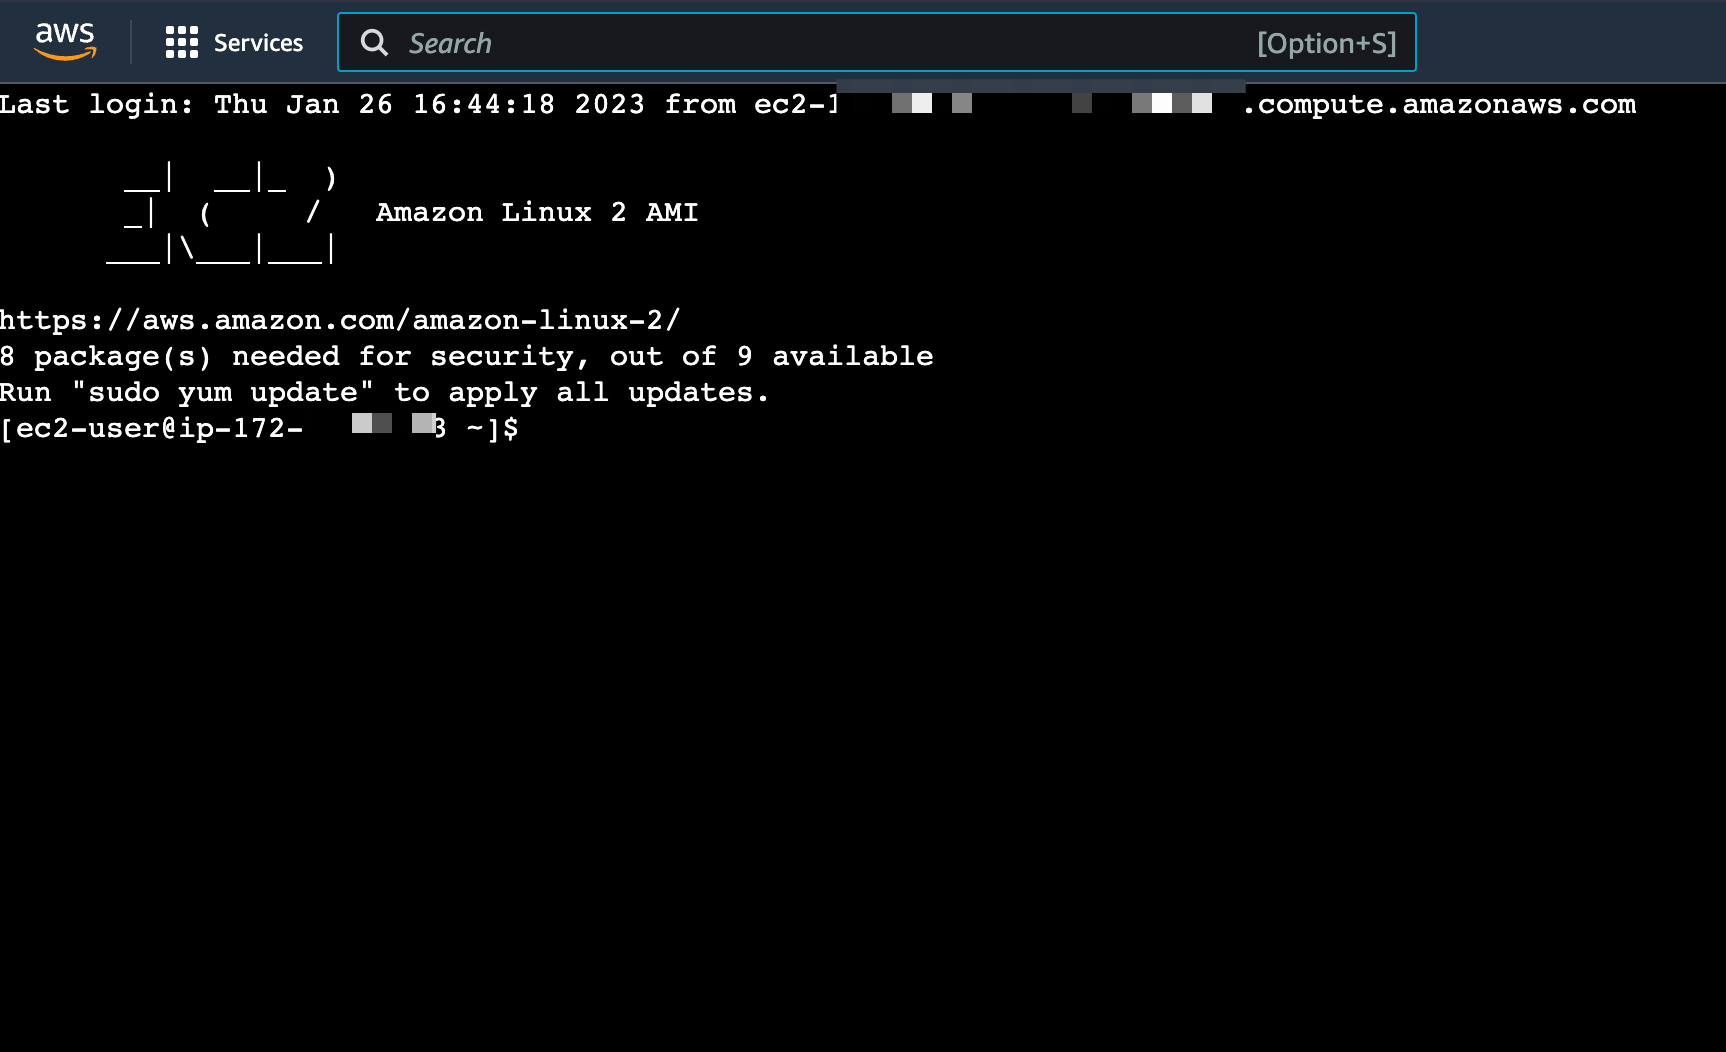
Then you should see a terminal window like the following image:
Follow the prompts to finish installing the Nimbus control plane:
License Key: If you don’t have one or have a previous one lost, please reach out to support@usenimbus.com for a new license key
Slug: Each trial installation will be provided with a free usenimb.us URL for easy setup and access. You can pick a slug as you like for example: happy-trial . After installation, your Nimbus web app will be available at https://happy-trial.usenimb.us
[Advanced]
VPC and Subnet
Without additional instruction, Nimbus creates EC2 for workspaces in each region’s default VPC. If you’d like to specify your own VPC and subnets, you can add the following config in /opt/nimbus/config.yaml (the single quote matters in config)
Then run sudo systemctl restart nimbus. And you are good to go!
[Highly Recommended] Setup Elastic IP
We highly recommend associating an elastic IP to the instance so that the instance IP will stay consistent after the restart. Here is the step-by-step guide to creating one elastic IP.
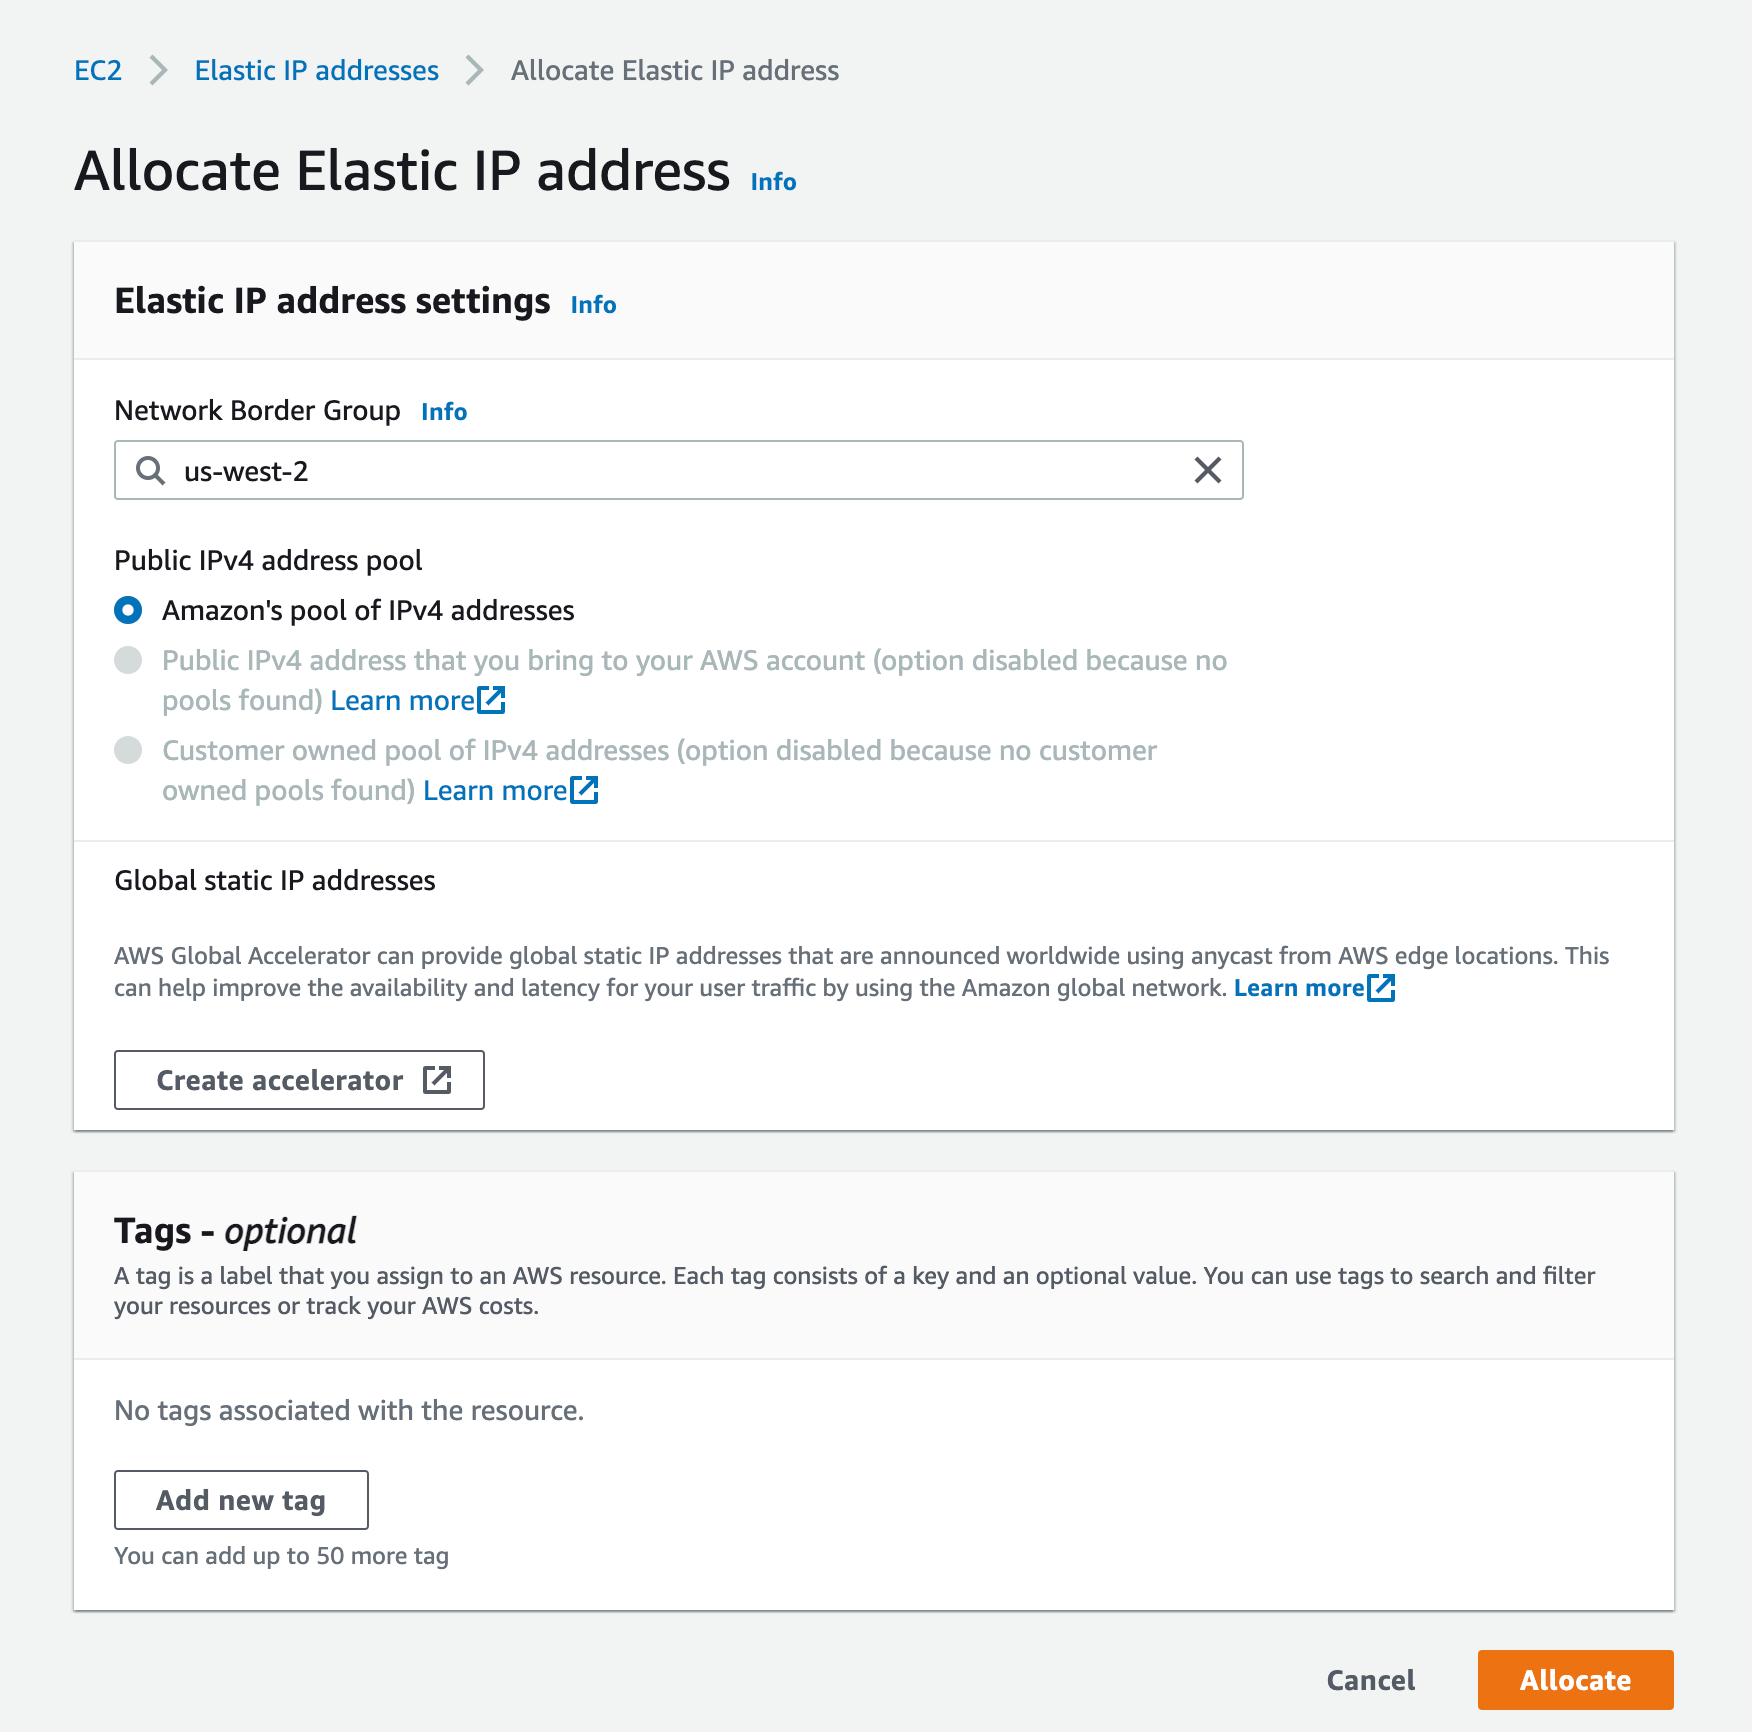
On the EC2 dashboard, click Elastic IPs. This will take you to all the elastic IPs you own. On the upper right corner, click Allocate Elastic IP address.
On the next page, you can pretty much keep all default settings. Make sure the Network Border Group is the same as the EC2 region. Click Allocate
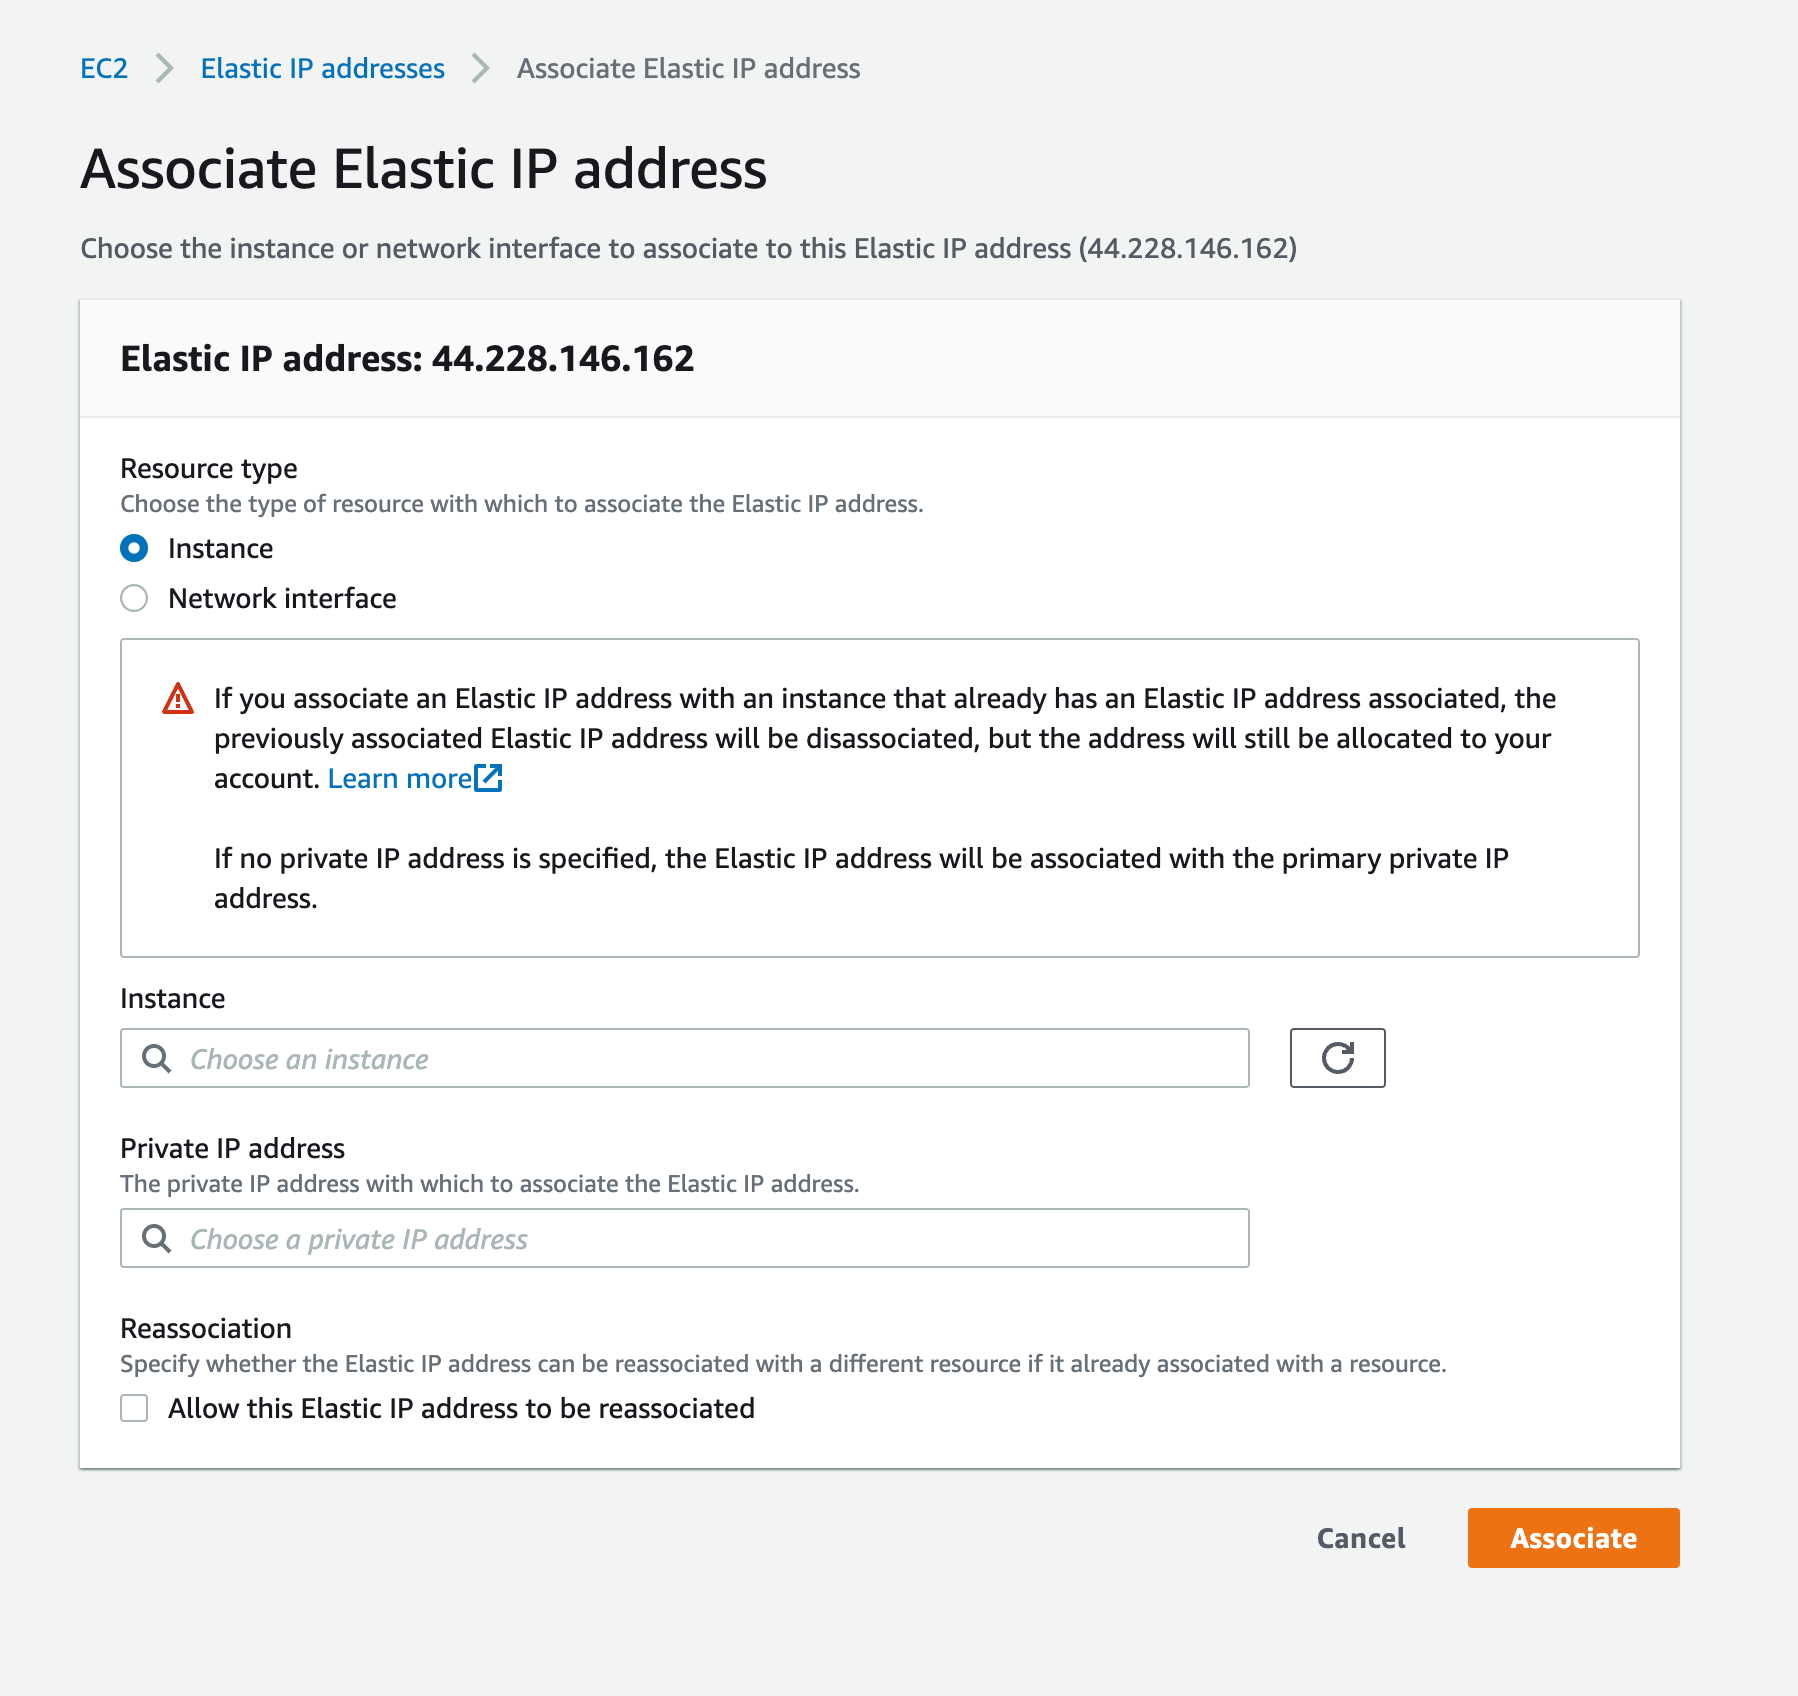
Then you will be redirected back to the Elastic IPs dashboard. Select the Elastic IPs you just created, click on Actions, and select Associate Elastic IP Address.
On the next page, keep Resource type as Instance , and select the Instance that you just created in the last step. Then click Associate
Now you’re done! You can go to the EC2 dashboard and check the instance’s public IP address. It’s the same as the elastic IP that you just created!