Okta is a popular identity provider used by businesses of all sizes. Integrating Nimbus with Okta allows you to use the identity Okta provides for your organization to Nimbus to easily manage your remote development environment. This feature is available for all customers using the self-hosted version of Nimbus
Create an OpenID Connect Application
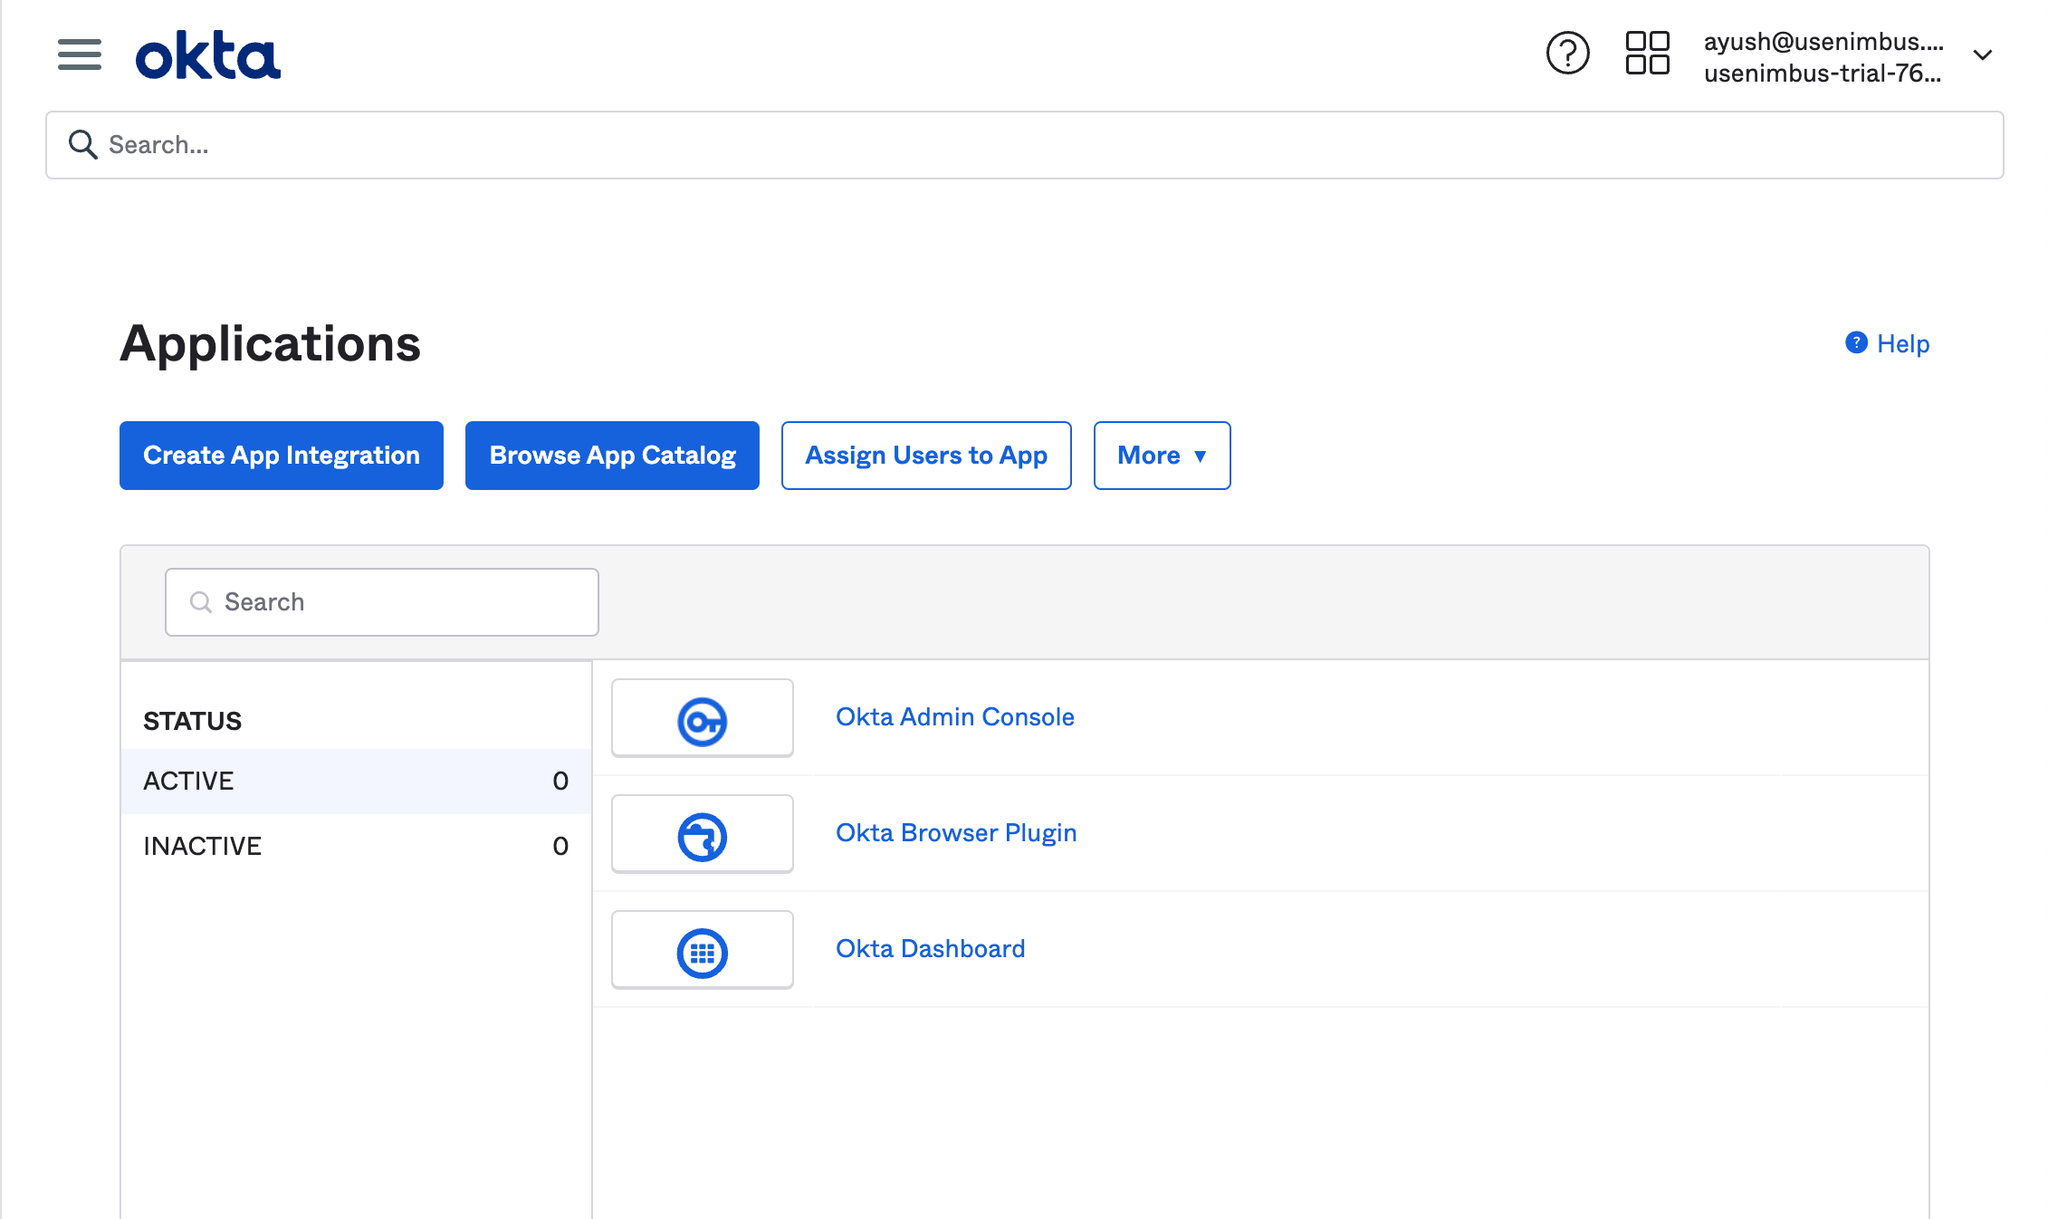
- Log in to your Okta account. From the left-hand menu, Select Applications → Applications on the top menu.
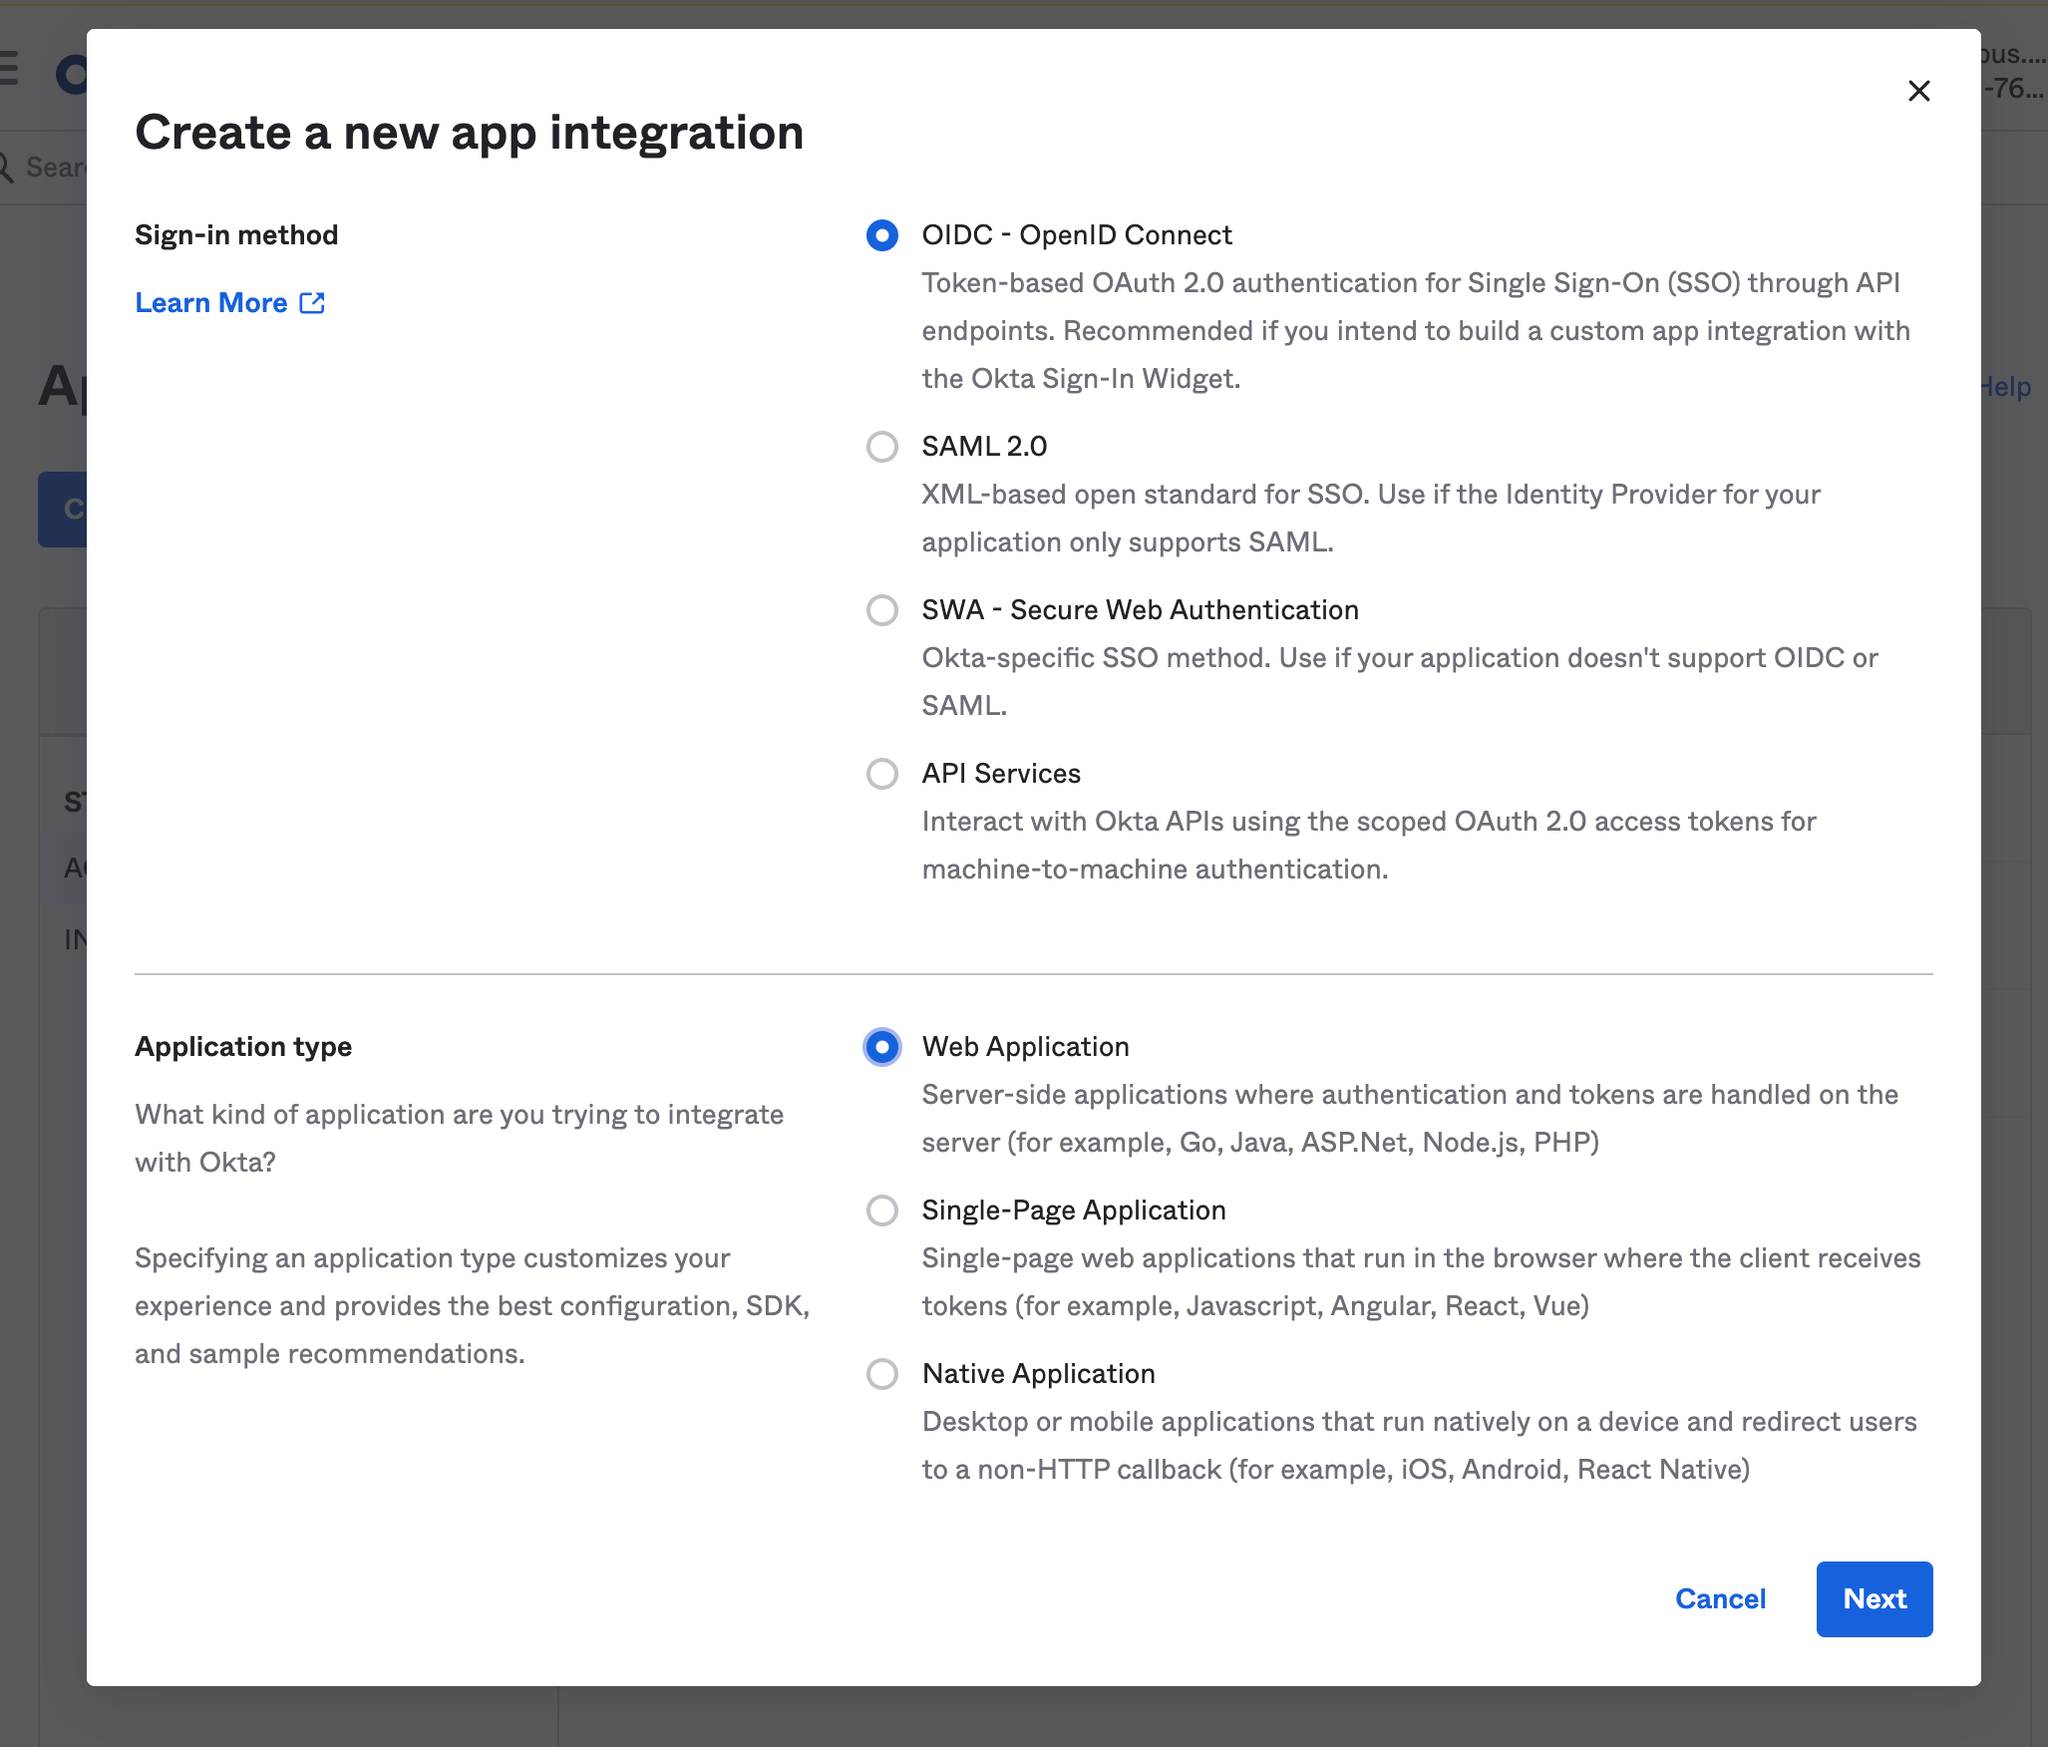
- Click the Create App Integration button. Select OIDC as the sign-in method. and Web Application as the application type
- Provide the following information for your application settings:
Field | Description |
Name | Nimbus |
Grant type | You must enable Refresh Tokens. |
Base URIs | {nimbus_url} |
Sign-in redirect URIs | {nimbus_url}/auth/callback |
Controlled access | Select one of the options |
Note:
nimbus_url is the URL of the self-hosted deployment, e.g. https://nimbus.company.comHit
Save 🙂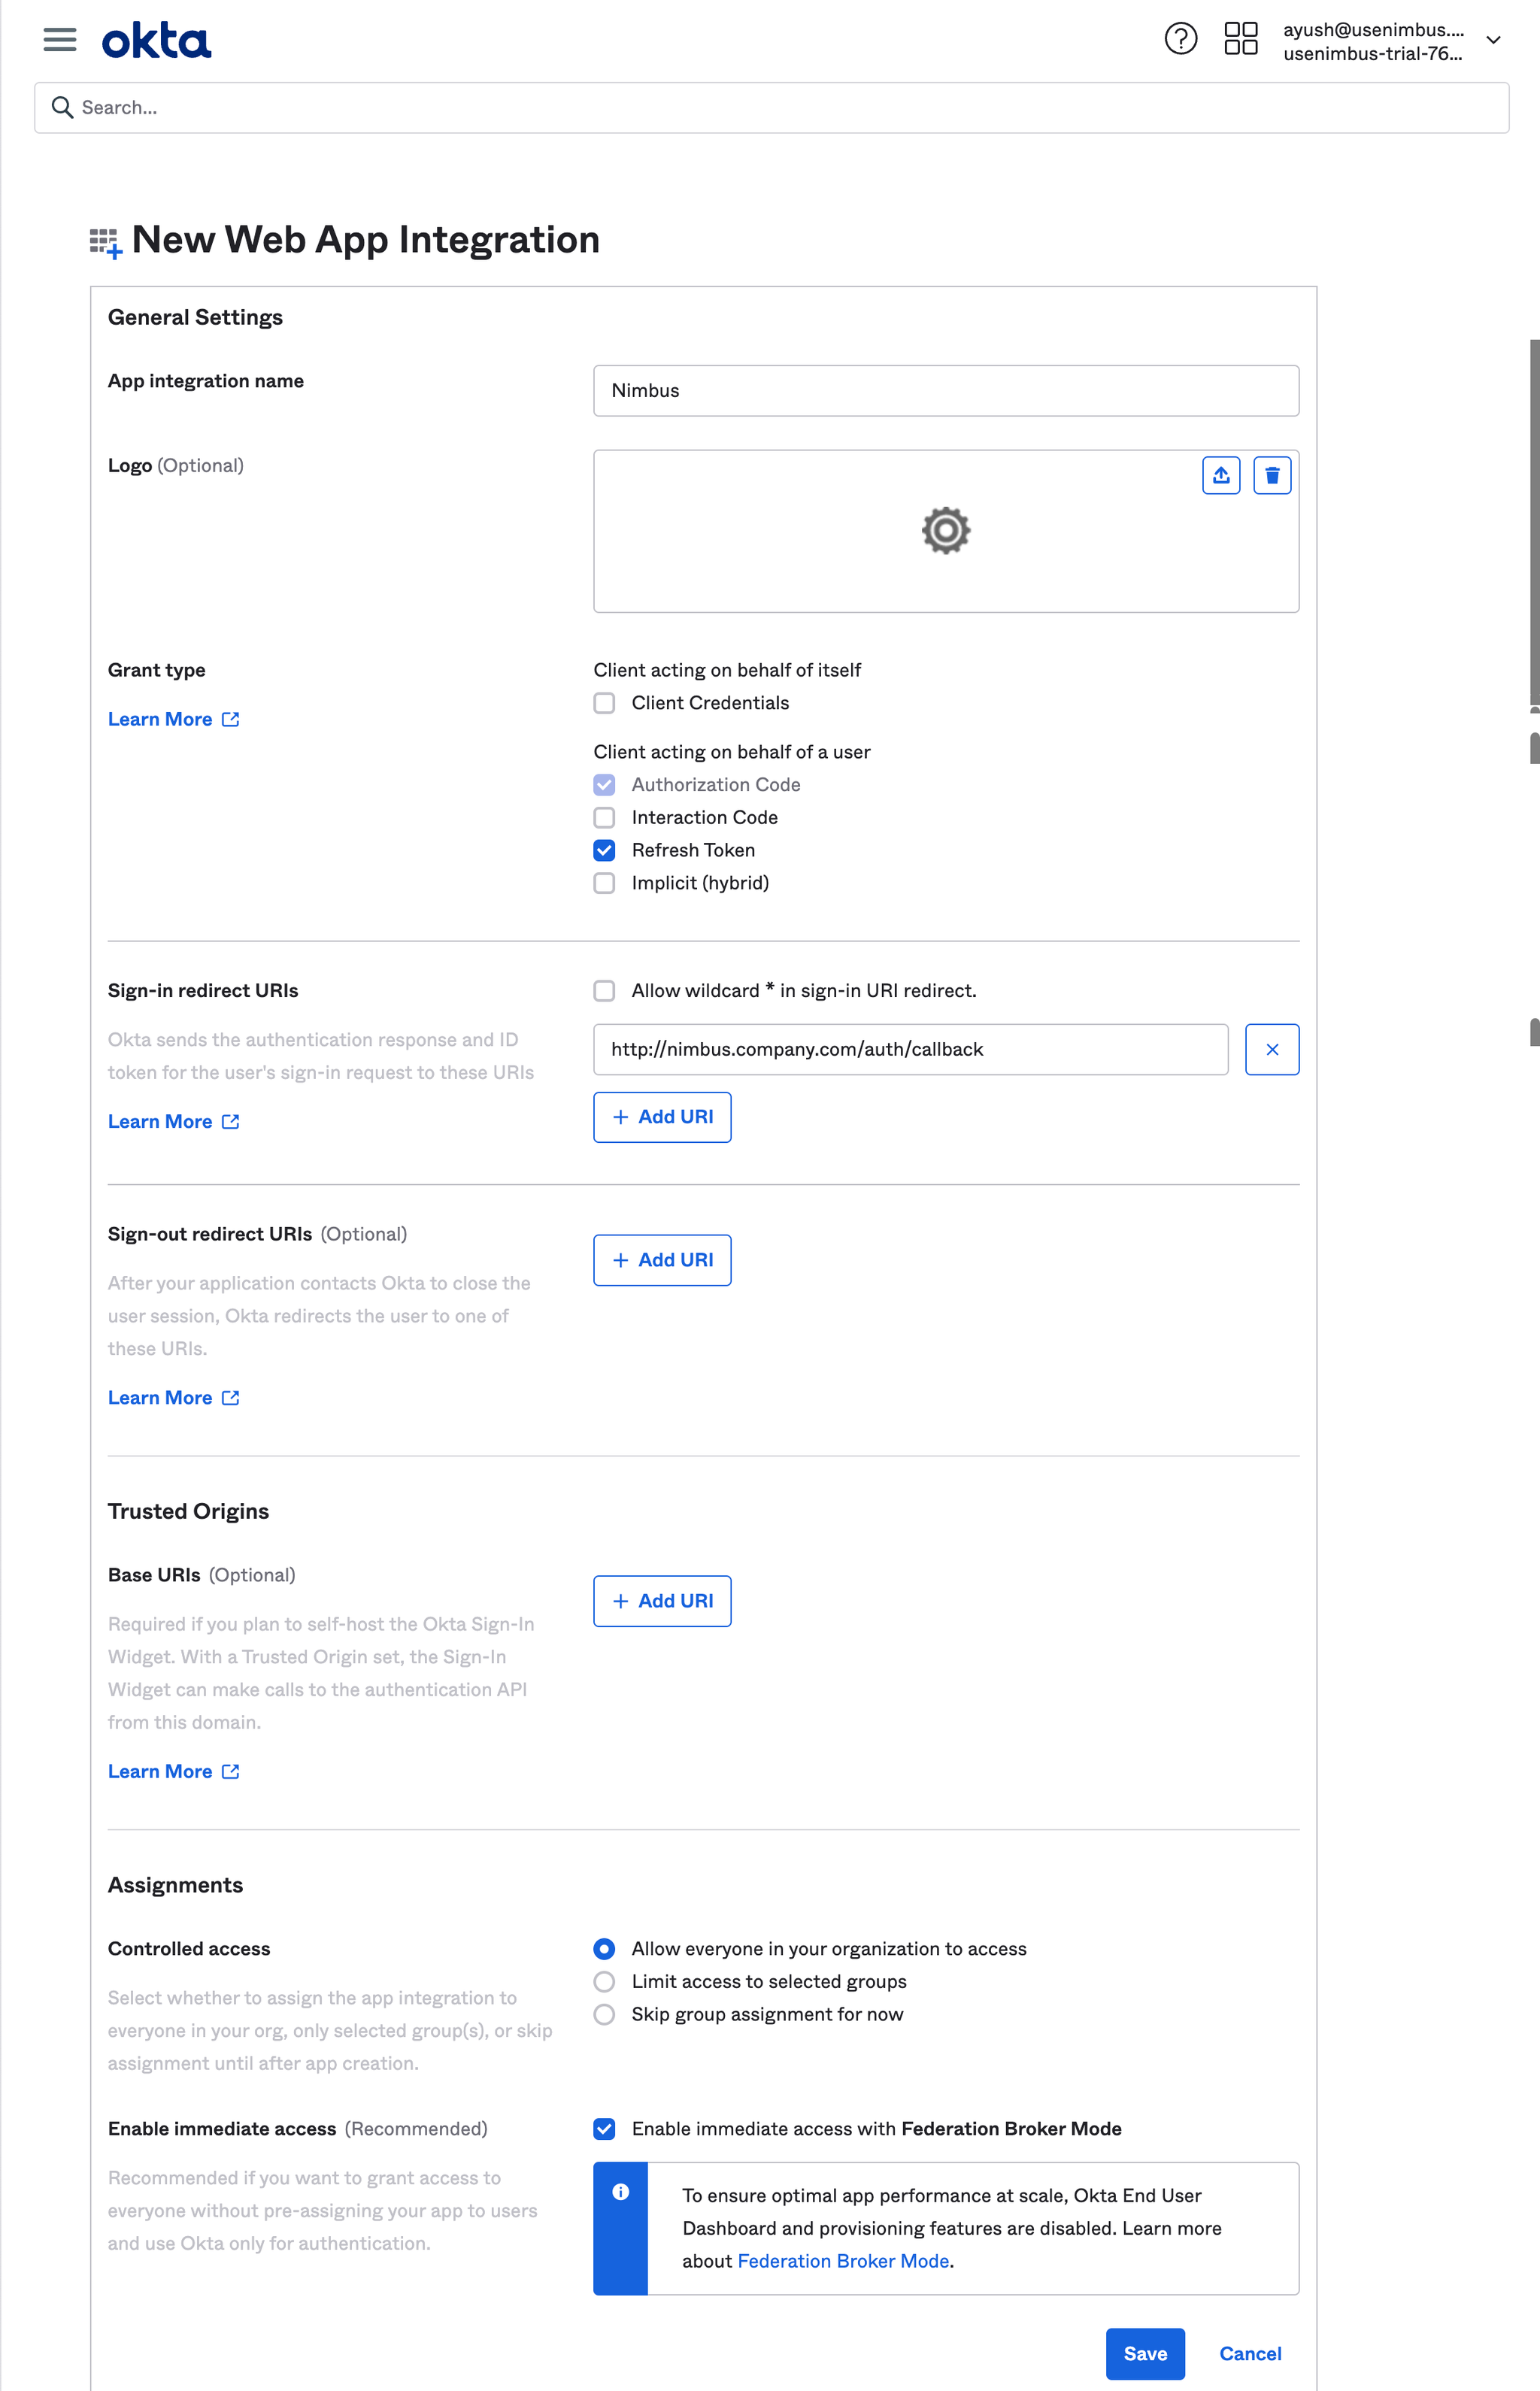
- xFrom the General tab, scroll down to the Client Credentials section. This section contains the Client ID and Client Secret.

Configure Nimbus
Finally, use these environment variables while provisioning Nimbus
javascriptSSO_PROVIDER="okta"
OIDC_ISSUER_URL="https://dev-42493368.okta.com"
OIDC_REDIRECT_URL={nimbus_url}/auth/callback
OIDC_CLIENT_ID="REPLACE_ME"
OIDC_CLIENT_SECRET="REPLACE_ME"
If you face any difficulties or need more information, head over to the master docs hosted by Okta’s Developer docs here - Create an Okta app Integration